

1. Introduction▲
This is an English translation of the following French tutorial:
http://chrtophe.developpez.com/tutoriels/maj-redobackup-xenial/
We made a first tutorial about the RedoBackup & Recovery translation.
This tutorial will allow you to:
- to have an up to date distribution ;
- to be UEFI and SecureBoot compatible ;
- to use a .deb package to install RedoBackup ;
- to install RedoBackup on any distribution you choose.
In the second part of this tutorial, we will start by updating the existing system ; next we will try to migrate to 64 bits with UEFI/SecureBoot support.
In the third part, we will build a RedoBackup package.
In the fourth part, we will make an install from scratch. We'll build a CD containing RedoBackup, based on a Ubuntu 16 (Xenial) distribution. The origin RedoBackup version is based on a Ubuntu 12 (Precise) distribution.
Lastly, in the fifth part, we'll see how to make an iso compatible UEFI and SecureBoot .
This tutorial is quite exhaustive, proposing different methods to obtain an up to date RedoBackup & Recovery live CD/DVD. You don't need to follow every parts to build your own. The 2,3, & 4 parts are relatively independent. We will let you know when looking to another part is necessary (for more explanations).
2. Update of existing CD▲
The original RedoBackup is available on www.redobackup.org. The manipulation was made on a virtual machine, and the update and creation operations were made in a session launched from the original CD start-up.
We will uncompress the SquashFS, modify it, and regenerate CD. For more information about the SquashFS operation, if you're not familiar with it, please look at:
2-1. Preparation▲
In our virtual machine, we'll start to create a file system on the virtual disk with Gparted or with command line.
Next, we mount it in /mnt with command:
mount /dev/sda1 /mnt/dev/sda1 may be different on your system, adapt it to your situation.
2-2. SquashFS uncompressing▲
We install the squashfs-tools :
apt-get install squashfs-toolsNext, we uncompress the CD SquashFS :
cd /mnt
unsquashfs /cdrom/casper/filesystem.squashfs
This we uncompress the SquashFS in the squashfs-root folder.
2-3. SquashFS modification▲
We will make the modifications in chroot mode :
cd /mnt/squashfs-root
mount --bind /proc proc
mount --bind /sys sys
mount -t devpts none dev/pts
chroot .
Let's start with the repositories update :
apt-get updateNext, we'll use the do-release-upgrade command. First of all, we have to install the update-manager-core package, required by do-release-upgrade :
apt-get install update-manager-core
do-release-upgrade
do-release-ugrade will update the repositories required for migration.The we do the same operations as apt-get upgrade, but securely. The no-longer maintained packages will be left as is.
We will need to validate the packages download and deletions demands.
We had several configuration files update requests. We chose to overwrite current versions.
Then we have a screen about services stop:
|
|
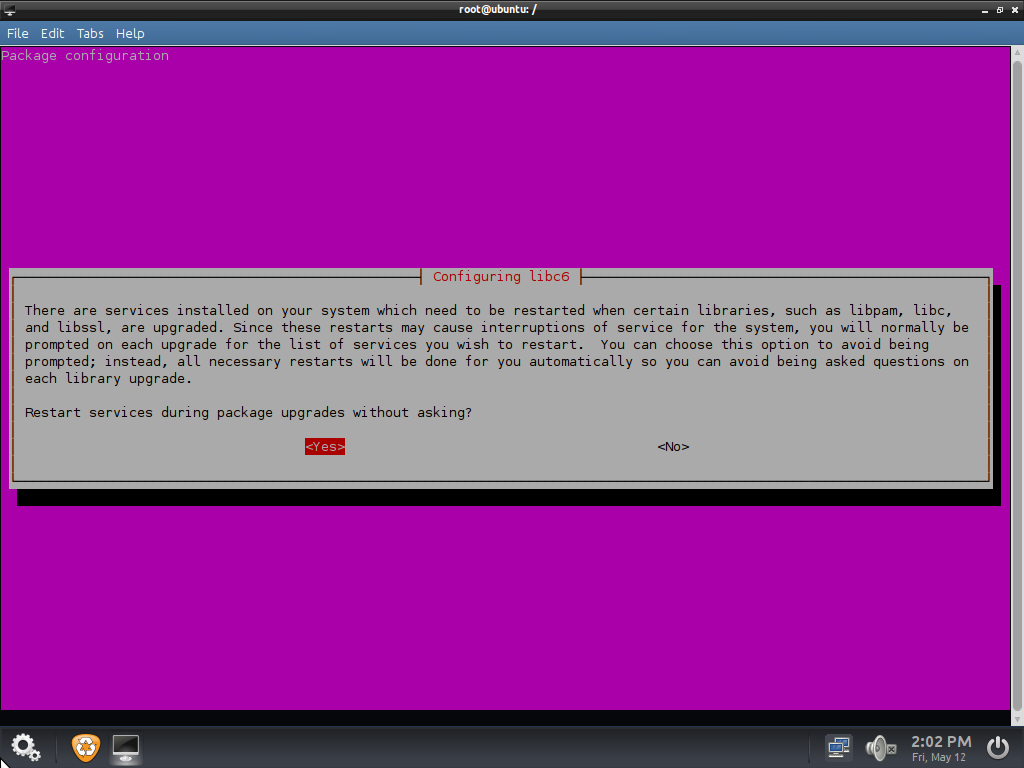
We answer « Yes ».
Next, we have a request about GRUB upgrade :
|
|
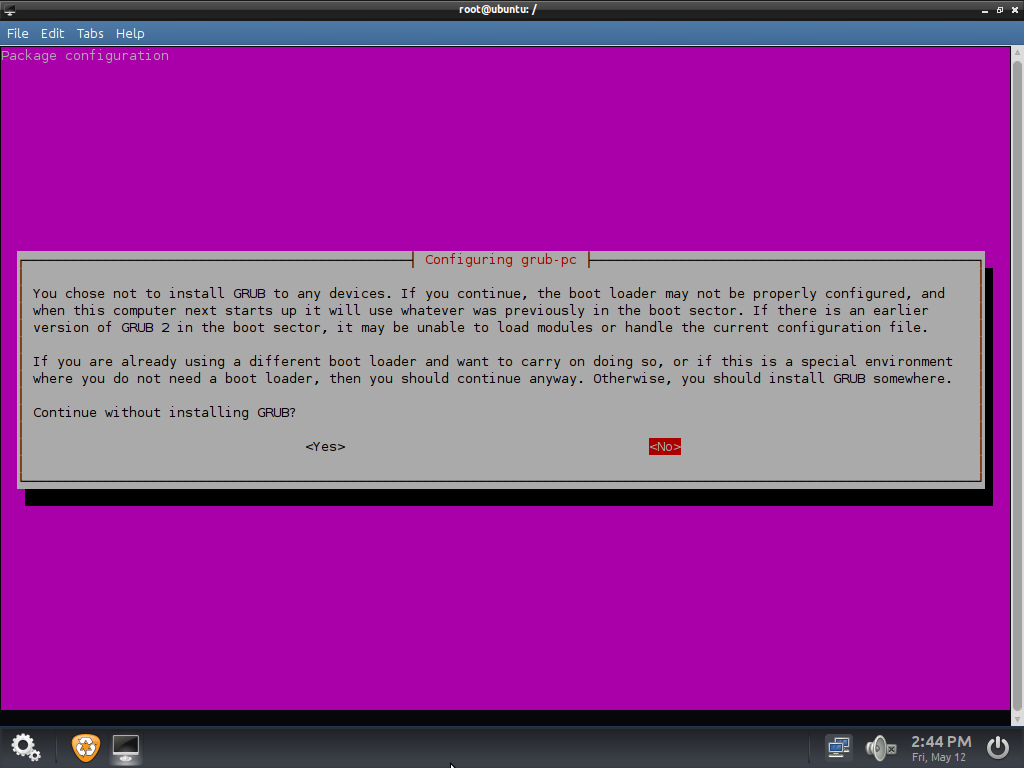
We select “yes”.
GRUB isn't used with RedoBackup iso, Isolinux is used instead of.
Then, we clean the packages cache:
apt-get cleanAnd we leave chroot:
exit
umount dev/pts
umount sys
umount proc
In case of unmounting problems due to opened files, just reboot.
2-4. New iso planning▲
We create a new SquashFS:
cd .. # return in the squashFS folder container (squashfs-root folder)
mksquashfs squashfs-root filesystem.squashfs -e boot
We name our file filesystem.squashfs, squashFS name used in live cds.
The -e option is used to exclude a folder. We exclude the /boot folder, the initrd and kernel being present in the CD-ROM casper folder.
In case of reboot (section 2.3), We have to reinstall the squashfs-tools.
We copy the original CD-ROM content in our working partition:
mkdir /mnt/iso
cp -Rv /cdrom/* /mnt/iso
The original CD-ROM content is mounted in the /cdrom mounting point. The -Rv options are for Recursion and verbose.
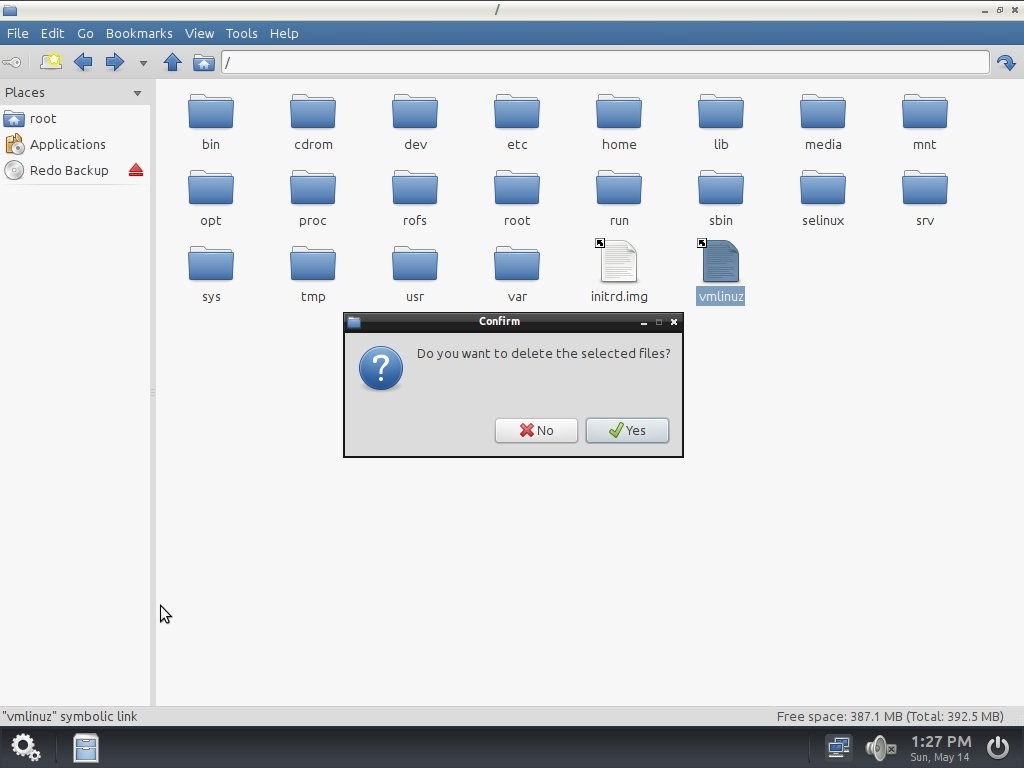
You also can make the copy in graphical mode with the PCManFM file manager.
We replace the SquashFS by ours:
mv filesystem.squashfs iso/casperWe remove the unused files in iso/casper, the .manifest and filesystem.size files. They are no longer reflect reality. Same thing for the root md5sum.txt file.
Next we move the updated kernel and initrd to the iso :
mv /mnt/squash-root/boot/vmlinuz* /iso/casper/vmlinuz
mv /mnt/squash-root/boot/initrd* /iso/casper/initrd.img
Be careful to take the more recent vmlinuz and initrd files in /boot.
We remove the iso/casper/initrd.lz file, replaced by initrd.img.
We also need to modify the isolinux/isolinux.cfg file and replace the references to initrd.lz by initrd.img.
2-5. CD burning▲
We will create a burning.sh script to be able to burn the CD, and to simplify multiple operations.
Here's its content:
!#/bin/bash
cd /mnt/iso
genisoimage -o file_name.iso -r -J --no-emul-boot --boot-load-size 4 --boot-info-table -b isolinux/isolinux.bin -c isolinux/boot.cat .
For more information about the genisoimage options, please have a look on its man page.
Do not forget to make the script executable (chmod +x burning.sh).
Next, we have to retrieve the iso.
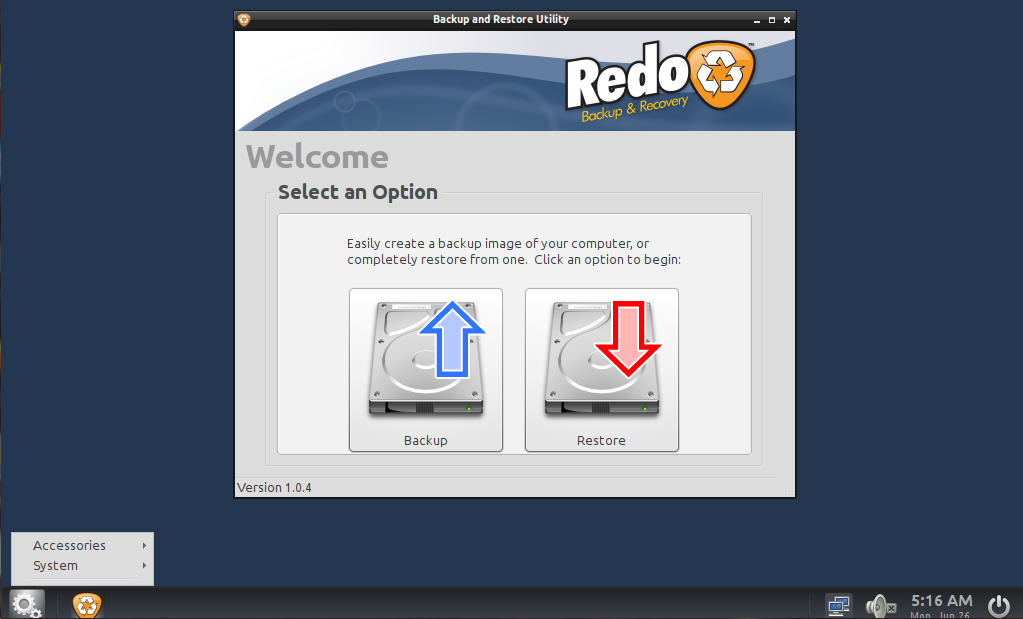
2-6. Result▲
The new generated iso has a size of 565 MB (compared to 326 for the original CD. We moved from version 12 - Precise to version 14 - Trusty, and the kernel was upgraded from 3.0.0-23 to 3.13.0-117.
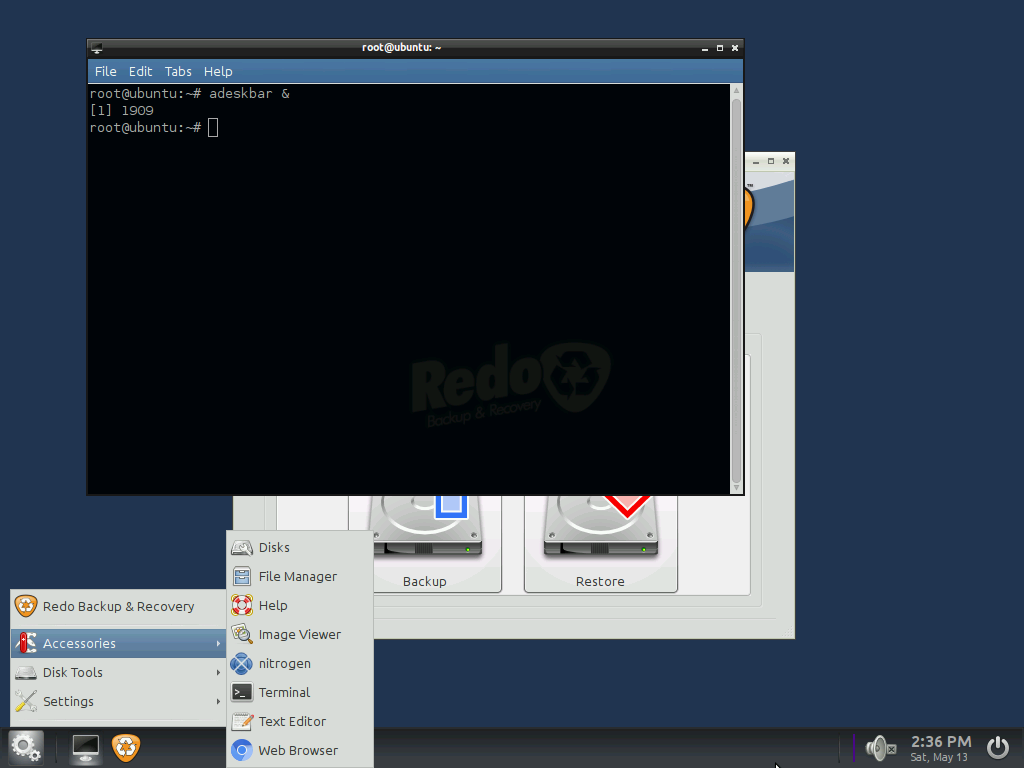
2-6-1. Adeskbar problem and solution▲
The Adeskbar origin menu is no longer there:
|
|
We take the original CD /etc/xdg/menus content folder. For this, we mount the original squash (with another cd device or copying the iso and mounting the squash file):
mount /dev/sr1 /cdrom
mount /cdrom/casper/filesystem.squashfs /cdrom
rm /etc/xdg/menus/*
cp /cdrom/etc/xdg/menus/* /etc/xdg/menus
Let's restart Adeskbar.
We retrieve it's pid with:
ps -auxThe Adeskbar process will be seen as follows:
root 1551..... /usr/bin/python /usr/share/adeskbar/main.pyWe kill the Adeskbar process with the kill command, pid 1551 in the example:
Kill 1551Then we restart it :
adeskbar &We retrieve our menu:
|
|
We copy the content of menu folder in the squashfs folder (in our example squashfs-root) in our working partition.
We observe additionnal entries such as «help», « Nitrogen ». We delete them in the /usr/share/Applications folder. We kill Adeskbar as before to check the result and do the same deletion in the squash wortking folder.
Then, we have to regenerate the squashFS and iso to check the result.
2-7. Next upgrade step▲
We continue launching do-release-upgrade again after chrooting, as seen previously.
We had to add the /run mounting point before chrooting to have network access:
mount -bind /run run2-8. New result▲
The new generated iso is 715 Mo. We moved from 14 - Precise to 16 - Xenial, and upgraded the kernel from 3.13.0-117 to 4.4.0-77.
2-8-1. New problem▲
When the CD boots, we don't have the splash screen and have the following messages:
/scripts/init-premounts/plymouth: line 38: /sbin/plymouthd: not found
/scripts/init-premounts/plymouth: line 38: /bin/plymouth: not found
The system starts, but the splash progress bar remains active:
|
|
To deactivate the progress bar, you just have to add the following line to the /etc/xdg/openbox/autostart file:
plymouth quitExcept for that, the system seems to work correctly.
2-8-2. Solving New Problems ▲
After looking for the problem on Internet, the issue comes form the Plymouth default folder. The old path was /lib, instead of /usr/share now.
We had a difficulty in the chroot, we had to execute chmod 1777 /tmp before to be able to execute apt-get update.
We reinstall plymouth to have the files to the right place.
apt-get install --reinstall plymouth plymouth-themesWe move the RedoBackup plymouth files:
mv /lib/plymouth/themes/redo-logo /usr/share/plymouth/themes
rm /lib/plymouth -rf
Next, we edit the /usr/share/plymouth/themes/redo-logo/redo-logo.plymouth file to correct the paths.
Next we do the followings operations:
update-alternatives --install /usr/share/plymouth/themes/default.plymouth default.plymouth /usr/share/plymouth/themes/redo-logo/redo-logo.plymouth 100
update-alternatives --config default.plymouth
The last command is used to select the default splash screen. We select the corresponding RedoBackup splash screen.
We regenerate initrd :
update-initramfs -uAfter leaving the chroot, we regenerate the CD after integrating the new initrd.
After booting, the splash screen is working.
The previously removed icons in the applications menu came back, we remove them again. We also had to remove the icons in the /etc/skel/.local/share/applications for the disk analyzer.
2-8-3. Additional display problem▲
We can see display modification. The dialog box icons no longer have round vertices.
Bad display :
|
|
Normal display:
|
|
2-8-4. Display problem solution▲
The lxappearance command gives a different result between the original CD and ours.
Source CD:
|
|
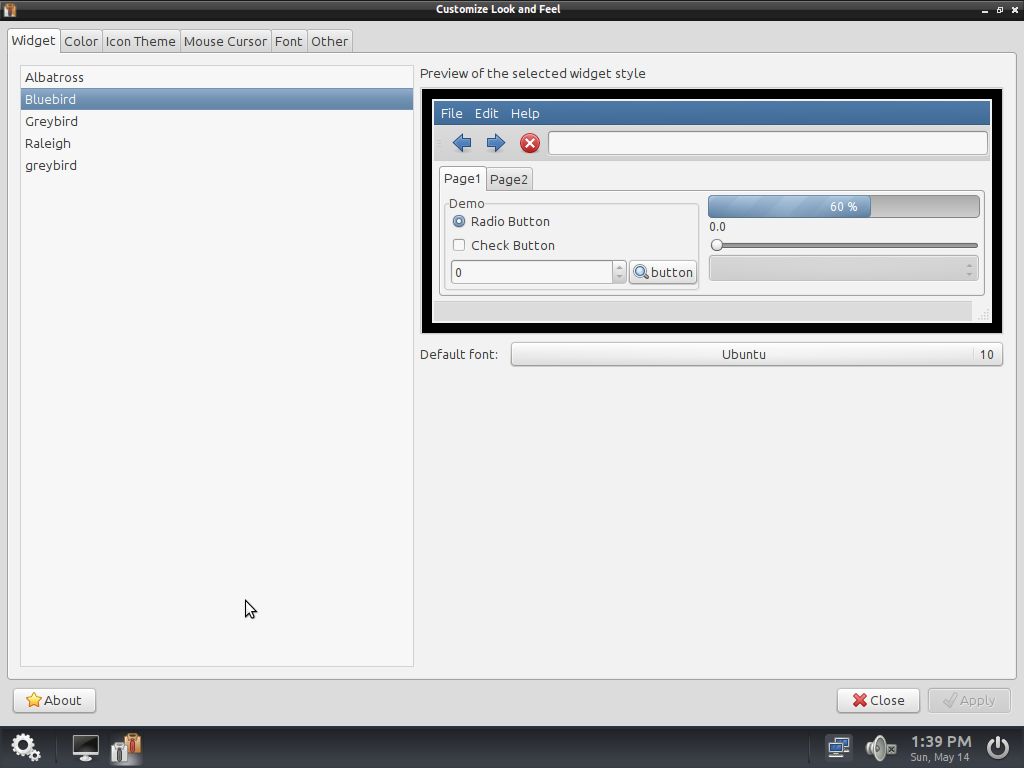
Current CD:
|
|
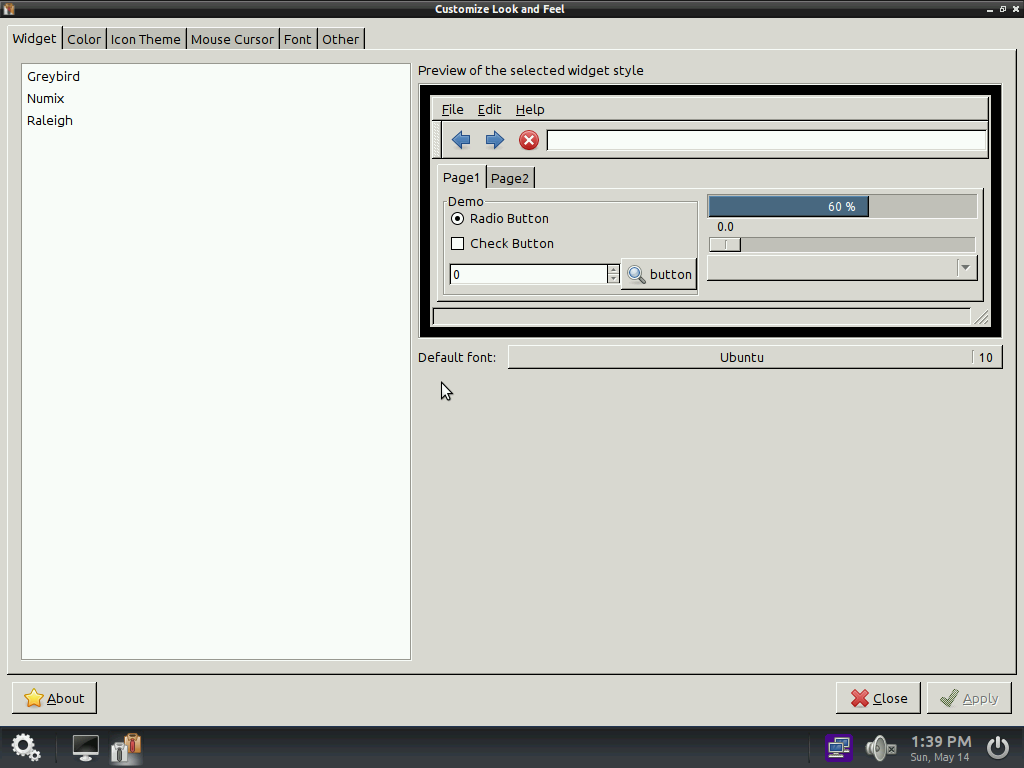
As we see, the source CD use the « bluebird » theme not present in our CD themes list.
So, we copy the /usr/share/themes/bluebird folder from the original CD. A click on right button and Reconfigure enables the correct display. We regenerate the squashFS and the CD.
2-9. RedoBackup tests▲
2-9-1. Ghost partition▲
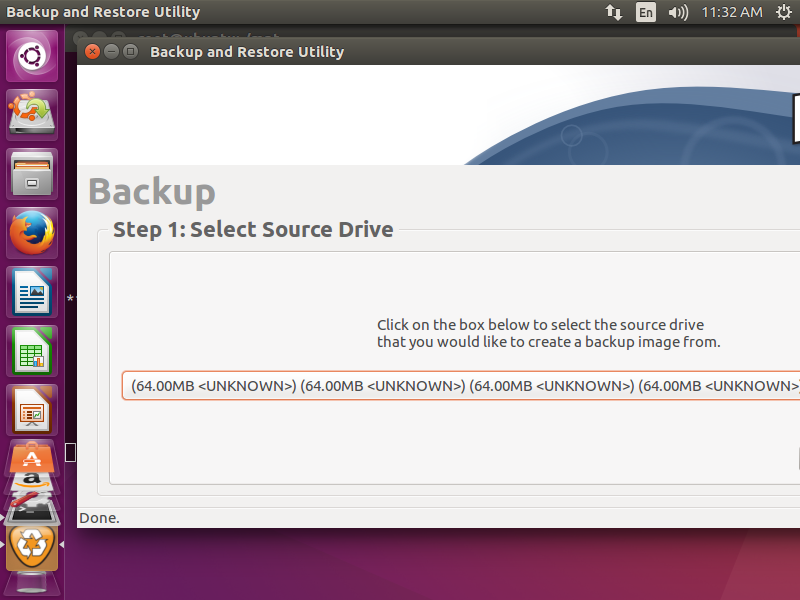
With our French translation, we saw ghost partitions named « Unknown » :
|
|
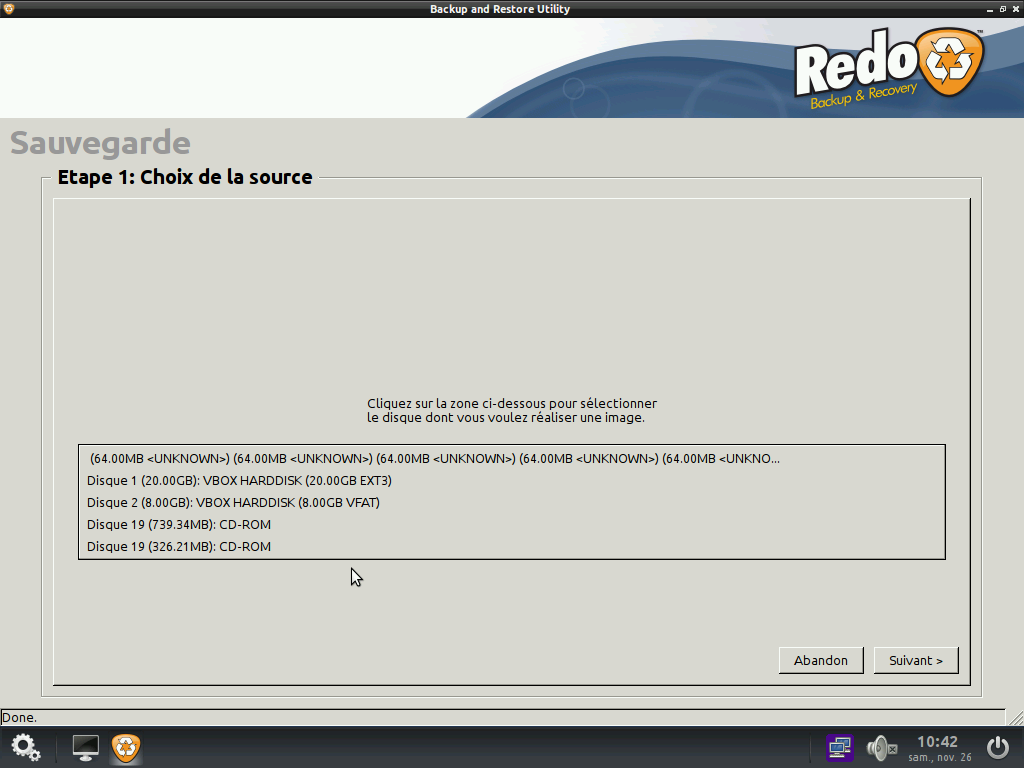
In our version, we don't have the problem. If you don't have the problem, just go to the next section: progress bar malfunctionProgress bar malfunction.
RedoBackup uses external programs such as partclone, fsarchiver (we will see that in the deb package creation for RedoBackup.deb package creation for RedoBackup part).
Let's see the result displayed by the command:
fsarchiver probe
ubuntu@PC-test:~# sudo fsarchiver probe

[======DISK======] [=============NAME==============] [====SIZE====] [MAJ] [MIN]
[sda       ] [VBOX HARDDISK         ] [  20.00 GB] [ 8] [ 0]
[sdb       ] [VBOX HARDDISK         ] [   8.00 GB] [ 8] [ 16]
[sr0       ] [CD-ROM             ] [  739.24 MO] [ 11] [ 0]
[sr1       ] [CD-ROM             ] [  326.21 MO] [ 11] [ 1]

[=====DEVICE=====] [==FILESYS==] [======LABEL======] [====SIZE====] [MAJ] [MIN]
[ram0      ] [<unknown> ] [<unknown>    ] [  64.00 MB] [ 1] [ 0]
[ram1      ] [<unknown> ] [<unknown>    ] [  64.00 MB] [ 1] [ 1]
[ram2      ] [<unknown> ] [<unknown>    ] [  64.00 MB] [ 1] [ 2]
[ram3      ] [<unknown> ] [<unknown>    ] [  64.00 MB] [ 1] [ 3]
[ram4      ] [<unknown> ] [<unknown>    ] [  64.00 MB] [ 1] [ 4]
[ram5      ] [<unknown> ] [<unknown>    ] [  64.00 MB] [ 1] [ 5]
[ram6      ] [<unknown> ] [<unknown>    ] [  64.00 MB] [ 1] [ 6]
[ram7      ] [<unknown> ] [<unknown>    ] [  64.00 MB] [ 1] [ 7]
[ram8      ] [<unknown> ] [<unknown>    ] [  64.00 MB] [ 1] [ 8]
[ram9      ] [<unknown> ] [<unknown>    ] [  64.00 MB] [ 1] [ 9]
[ram10      ] [<unknown> ] [<unknown>    ] [  64.00 MB] [ 1] [ 10]
[ram11      ] [<unknown> ] [<unknown>    ] [  64.00 MB] [ 1] [ 11]
[ram12      ] [<unknown> ] [<unknown>    ] [  64.00 MB] [ 1] [ 12]
[ram13      ] [<unknown> ] [<unknown>    ] [  64.00 MB] [ 1] [ 13]
[ram14      ] [<unknown> ] [<unknown>    ] [  64.00 MB] [ 1] [ 14]
[ram15      ] [<unknown> ] [<unknown>    ] [  64.00 MB] [ 1] [ 15]
[loop0      ] [squashfs  ] [<unknown>    ] [  694.65 GB] [ 7] [ 0]
[sda1      ] [ext3    ] [<unknown>    ] [  20.00 GB] [ 8] [ 1]
[sdb1      ] [vfat    ] [<unknown>    ] [   8.00 GB] [ 8] [ 17]
The result may be change according to your configuration.
We notice than the ghost disks are RAMDISK.
2-9-1-1. Redobackup code analysis and modification▲
We searched in the redobackup code lines calling fsarchiver. We found it in functions:
- sub find_local_drives ;
- sub find_local_partitions.
In the find_local_partitions function, we see the following Perl code:
# Get each partition's details
   next if $line =~ m/^\n/;
   next if $line =~ m/^loop/;
   next if $line =~ m/^ramzswap/;
   next if $line =~ m/^dm-/;
Let's try adding the following line:
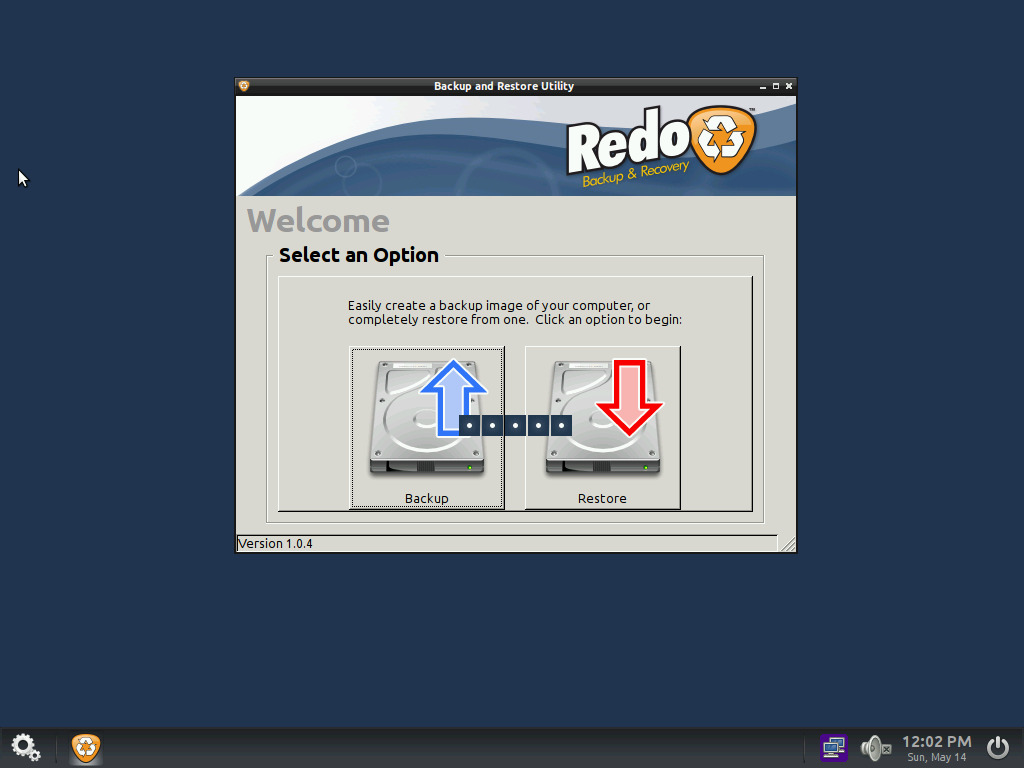
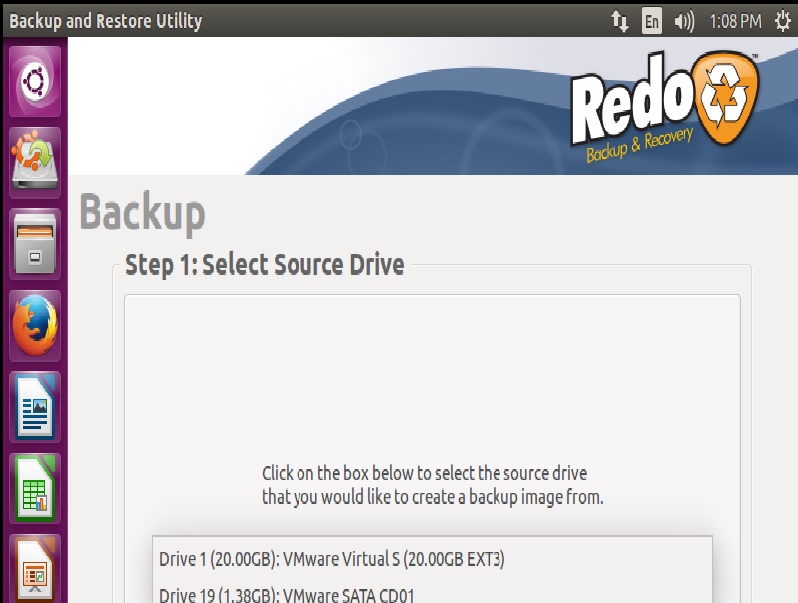
We launch RedoBackup again and click on « Backup »:
|
|
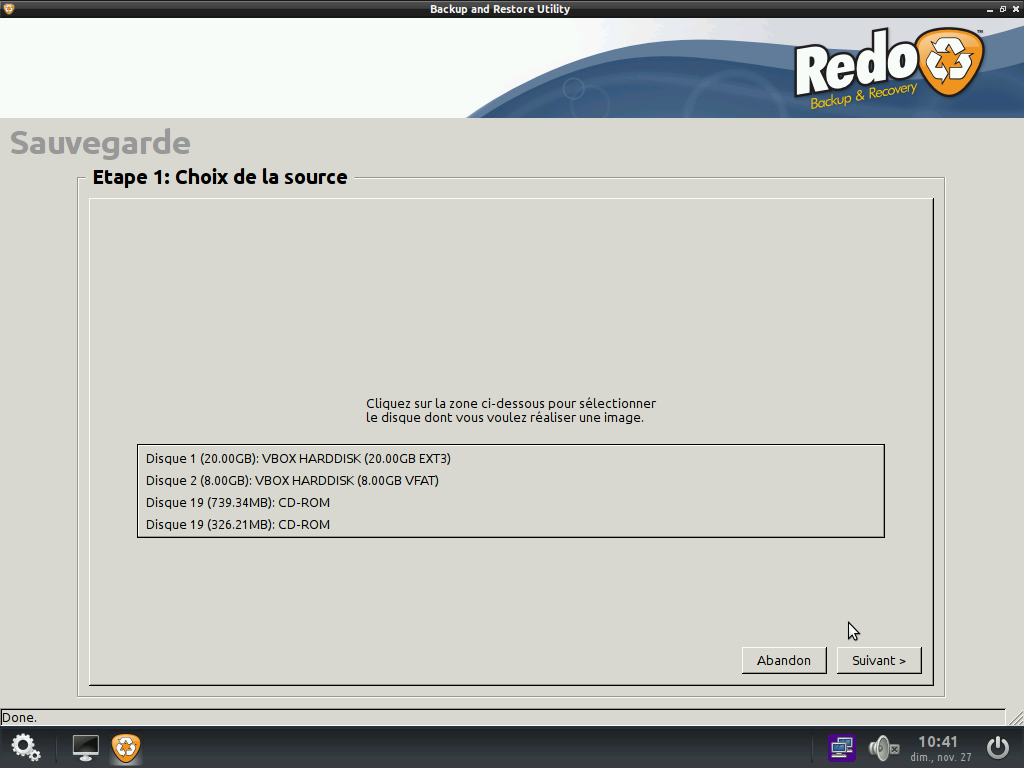
It works.
2-9-2. Progress bar malfunction▲
In our French translation, the Redobackup progress bar didn't work. If you do not have the problem, go to the next sectionCleaning and lightening.
We launch a backup and notice that the progress bar is stuck:
|
|
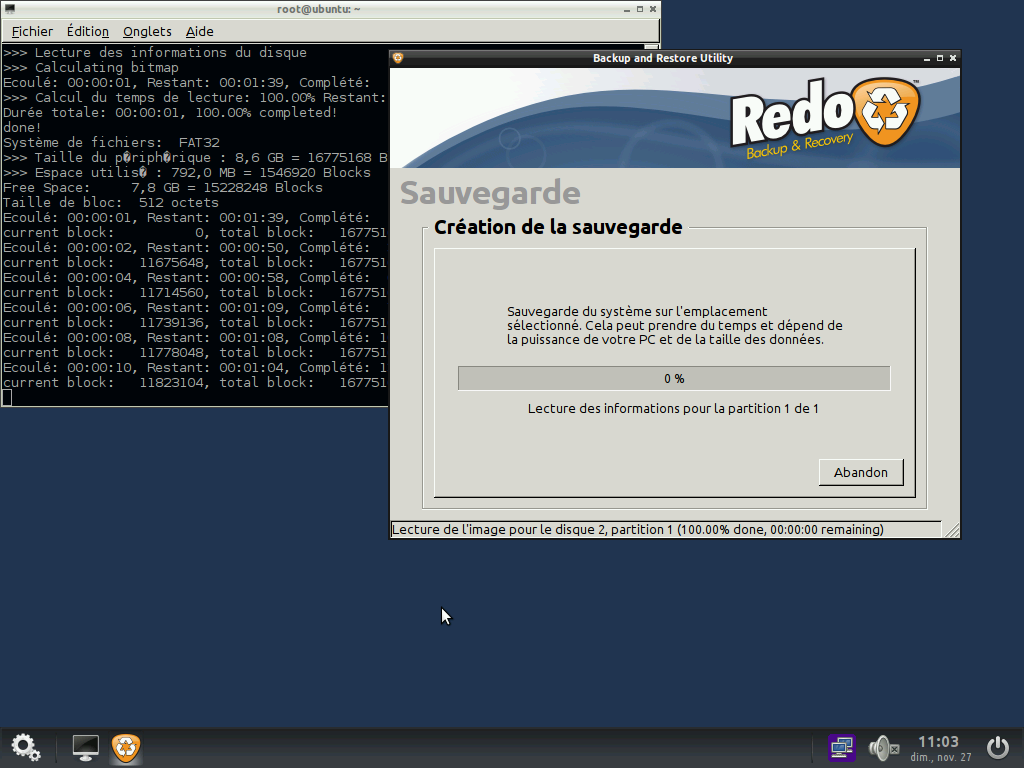
The backup works, but the RedoBackup progress bar doesn't work. If we launch the original script, we have the same problem. So, it's not due to our modifications.
Deleting the /usr/share/locale/fr_FR/LC_MESSAGES/partclone.mo file solved the problem.
Analysing redobackup script, we noticed the using of partclone.log to update the progress bar. After tests, we isolated the problem from the partclone translation file (the French one, we don't know if it's specific to the French translation).
2-10. Cleaning and lightening▲
2-10-1. Browser replacement option▲
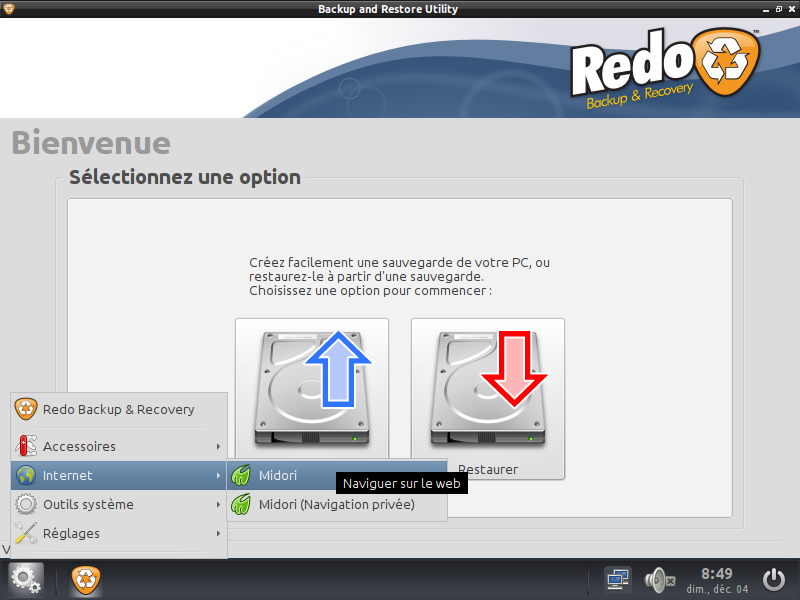
To make the distribuition lighter, we propose to replace the Chromium browser with Midori, which is much smaller. You can keep the original if you prefer. If you replace it, don't forget to replace the /etc/xdg/openbox/menus.xml accordingly.
Midori add a new separate entry, named Internet :
|
|
2-10-2. Removing unnecessary packages▲
In chroot mode, we start deleting old kernels:
dpkg -l|grep ii|grep linux-image* #list of installed kernel packages
apt-get purge [name of package to remove]
The same method is used to list packages and remove unused:
dpkg -l|grep ii|morePackage uninstalling can make distribution unstable. Do it with caution, and pay attention to dependencies. When in doubt, leave them. The package description can help.
These are the packages that we uninstalled:
- aspell*;
- colord*;
- curftpfs;
- dns-root-data;
- enchant;
- gksu;
- grub*;
- lockfile-progs;
- logrotate;
- usbmuxd;
- wamerican;
- wodim;
- yelp.
2-10-3. Cleaning▲
We will use the bleachbit tool allowing a system deep cleaning and the superfluous languages. We start by installing it:
apt-get install bleachbitThen we launch it:
bleachbit|
|
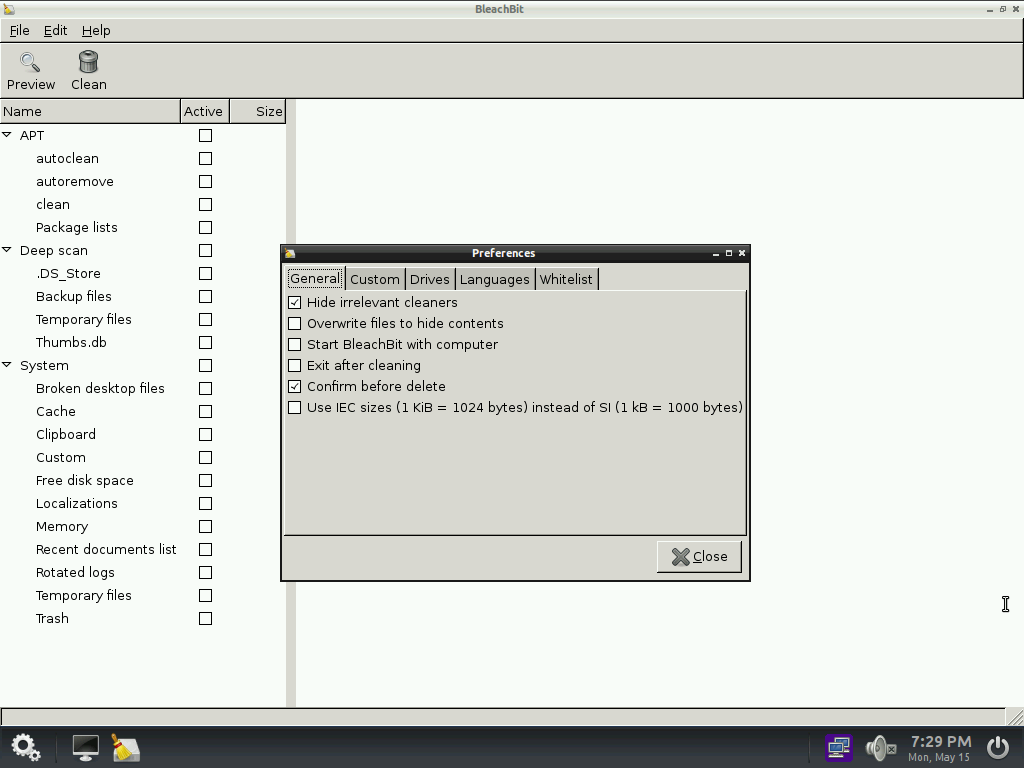
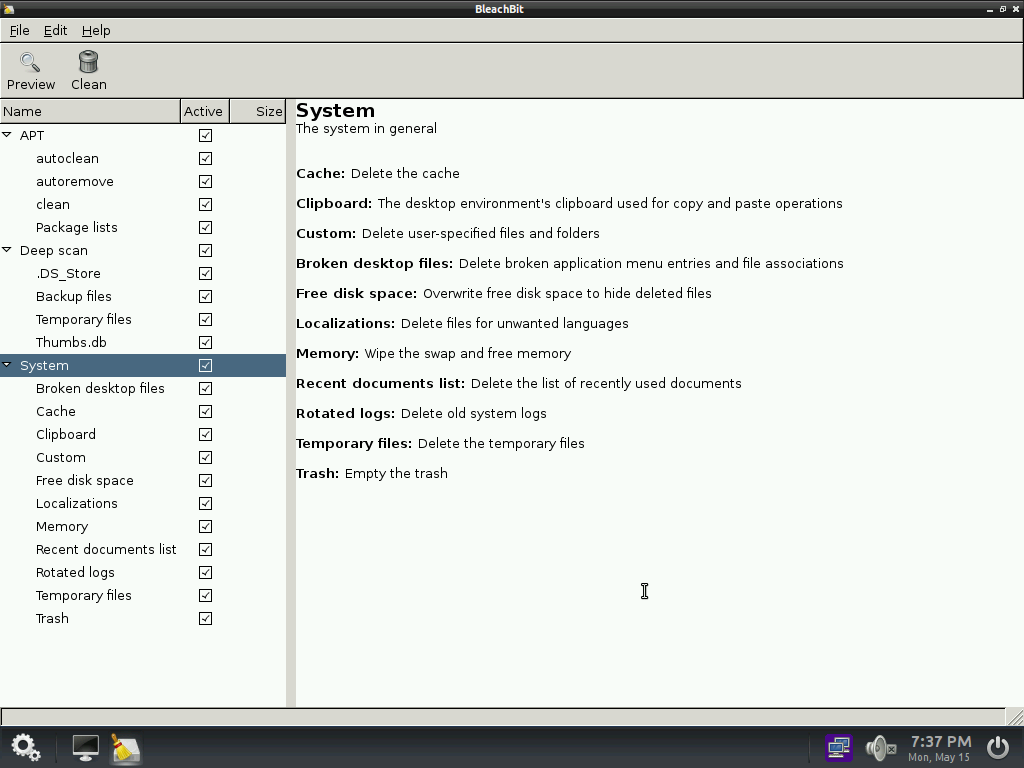
Bleachbit opens a preference window in which it is possible to select languages to keep. By default the deletion of all languages except which is in use is proposed, as well as English. After closing this window, we're in the main windows offering file deletion choice. We check all options and launch the cleaning.
|
|
Once the operations are completed, we delete the software and it's configuration files since it will be useless in the final image:
apt-get purge bleachbit
apt-get autoremove
apt-get clean
rm -rf ~/.config/bleachbit
Once we exited the chroot mode, before burning a CD again, we clean the following folders:
- tmp;
- var/log;
- var/tmp;
- var/run;
- run;
- usr/src/*;
- usr/include;
- usr/share/doc/*;
- usr/share/help/*;
- usr/share/help-langpack/*;
- usr/share/locale/* except en;
- usr/share/locale-langpack/*;
- usr/share/man/*.
Now we have a 433 Mb ISO file.
2-11. UEFI/SecureBoot▲
The SecureBoot section is explained in detail in the 5th chapterSecureBoot compatibility.
Please note that Secureboot requires a signed compatible bootloader.
2-11-1. Chosen solution ▲
First, we have tried to generate a ISO with a 64 bits and a 32 bits included kernels able to boot in UEFI/Legacy mode. Applications will stay in 32 bits, a 64-bit OS being able to run 32-bit code.
The tests resulted in a solution Legacy/UEFI SecureBoot compatible with a 32-bit kernel. So, we will only use a 32-bit one, since a 64-bit system is able to boot a 32-bit OS.
In case of Legacy boot mode with a BIOS, the kernel will be booted via Isolinux. In case of UEFI boot, Grub will make the job, like an Ubuntu Live DVD. The user will not have to choose.
2-11-2. UEFI support▲
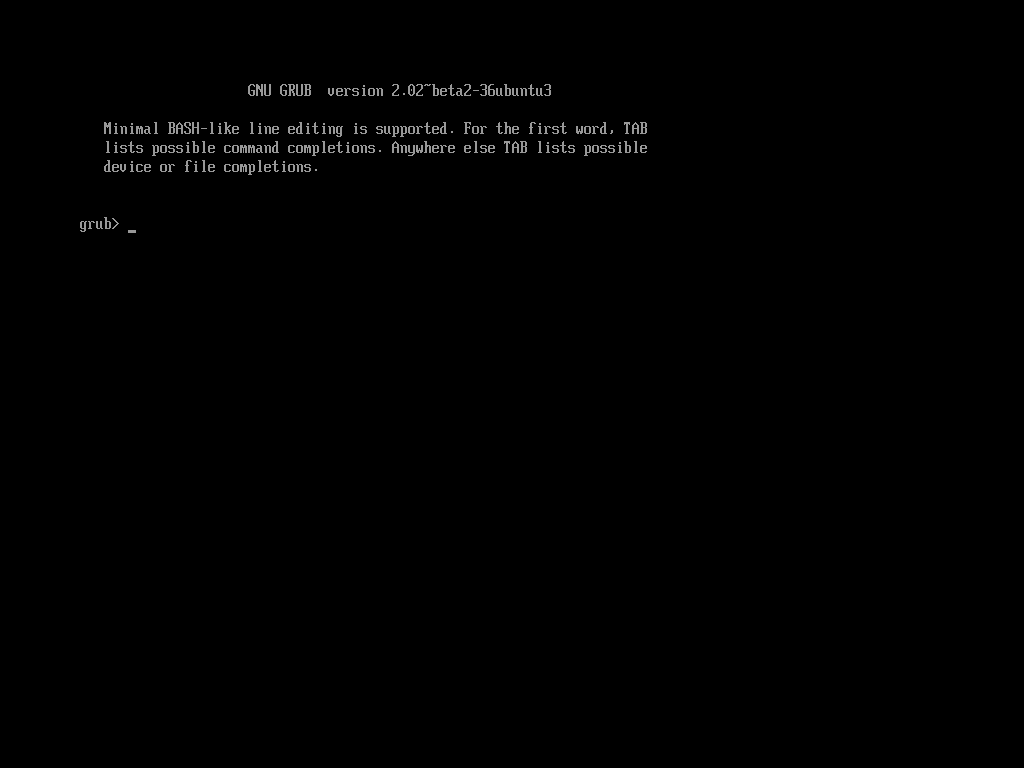
We copy the EFI folder from the “Ubuntu-Desktop-Amd64” DVD, this one is Secureboot compatible. Then we activate the UEFI support on our virtual machine. When we boot, we have this grub prompt:
|
|
Deactivate UEFI will reset to standard isolinux display.
When copying the Ubuntu Live DVD EFI folder and activating UEFI, the grub interface boots. The Grub shell will appear because it doesn't find the configuration file. We test entering the following commands:
linux /vmlinuz boot=casper
initrd /initrd.img
boot
If you don' t add « boot=casper », the kernel will stop in the initramfs, it will not be able too mount « / ».
We integrate the Ubuntu ISO boot folder hoping to have the necessary settings. The original grub.cfg file will be the basisfor our GRUB menu.
On CD regenerated, we had to modify menu by pressing the key “e” to correct the kernel and initrd names, then validate with F10. In our French case, adding locale=fr_FR enabled us to have a French interface, but the keyboard stayed in QWERTY (as opposed to AZERTY, the keyboard layout used for French). To solve this, we added the setxkbmap fr command to the /etc/xdg/openbox/autostart file (SquashFS rebuild required). You can use this principle to your situation, if you don't want to use English.
We tried to display the background picture adding the following command in grub.cfg :
GRUB_BACKGROUND=/isolinux/bg_redo.pngThis doesn't work. It seems this option is not compatible with Grub used version, the Ubuntu Desktop amd64 DVD not displaying picture in UEFI mode, while there is one in non UEFI mode.
2-11-3. SecureBoot support▲
After a few tests, A CD like ours doesn't boot in SecureBoot, while VMWare is compatible after adding the following line to the .vmx file:
firmware = "efi"After this option is activated in the vmx file, a non compatible SecureBoot media will not boot.
After some research, we found the following script allowing ISO BIOS and UEFI compatible burning (script to execute from the folder containing datas):
xorriso -as mkisofs -b isolinux/isolinux.bin --no-emul-boot --boot-info-table --boot-load-size 4 -c isolinux/boot.cat --isohybrid-mbr isolinux/isohdpfx.bin --eltorito-alt-boot -e boot/grub/efi.img --no-emul-boot --isohybrid-gpt-basdat -o /mnt/test.iso -r .The isohdpfx.bin file was retrieved in /usr/lib/ISOLINUX after package installation via apt-get. The efi.img file being present after boot/grub folder copy as seen before.
We'll also add the .deb file to the root. It's generation will be seen in the next chapter.
3. .deb package creation for RedoBackup▲
We will create a .deb package containing RedoBackup and installing dependencies, to be able to use it on all distribution types.
For our tests, we created a virtual machine starting on a Debian Live 8 distribution, to build and test our package. The files will be copied on the virtual machine disk. We will add a second virtual hard disk to be able to make backup/restore tests.
3-1. Test of operation▲
After having added a second virtual CD(the main one being used by the live CD), we started to mount the original redobackup_fr CD in /mnt2 with following commands:
sudo mkdir /mnt2
sudo mount /dev/sr1 /mnt2
sudo mount /mnt2/casper/filesystem.squashfs /mnt2
/dev/sr1 Is the second VM CD.
This commands mount the RedoBackup CD SquashFS /mnt2 in folder.
Next we copy the /sbin/redobackup file and the /usr/share/redo folder on the live to test (RedoBackup is a Perl script. See our Redobackup Translation tutorial).
sudo cp /mnt2/sbin/redobackup* /sbin
sudo mkdir /usr/share/redo
sudo cp -R /mnt2/usr/share/redo/* /usr/share/redo
Next, we launch the command from the console and obtain the following message:
Gtk-Message ** : Failed to load module "canberra-gtk-module"Followed by :
Can't locate XML/Simple.pm in @INC ….........We install packages starting with lib-xml-simple-perl :
apt-get install libxml-simple-perlOnce the package is installed, the RedoBackup interface starts but without the butons (backup & restore) :
|
|
Next, we install canberra:
apt-get install libcanberra-gtk-moduleThis doesn't solve the icon display problem.
Next, we have the following problem:
sh: 1: notify-send: not foundSolved with the necessary package:
apt-get install libnotify-binAt this point, no more error messages in the console. We click on “Backup” this causing an error directly in RedoBackup:
|
|
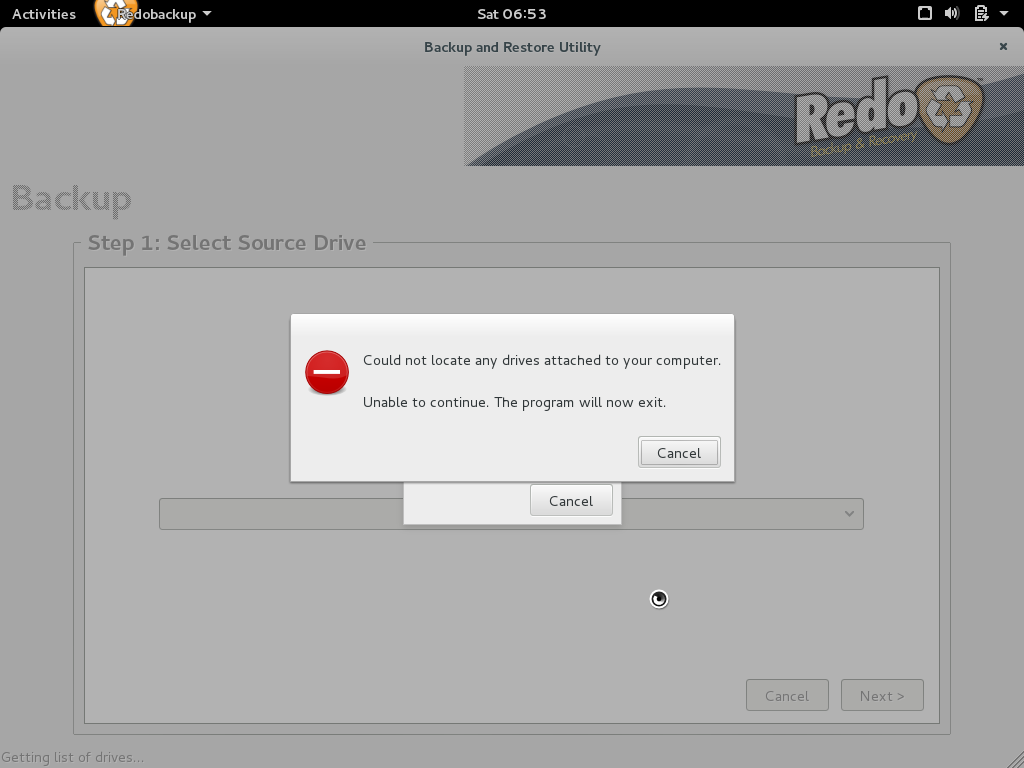
In the console, we have two errors messages:
Use of uninitialized value $drivelist in scalar chomp at /sbin/redobackup line 1334.
Use of uninitialized value $drivelist in string eq at /sbin/redobackup line 1335.
Can't exec "beep": No such file or directory at /sbin/redobackup line 1603.
The last message was simply solved by:
apt-get install beepHere is the line in RedoBackup causing an error:
Without knowing Perl, we recognize a system command:
fsarchiver probe 2>&1fsarchiver is a tool to save the content of a filesystem in a compressed archive.
We install it:
apt-get install fsarchiverThe process stays blocked on the progress bar:
|
|
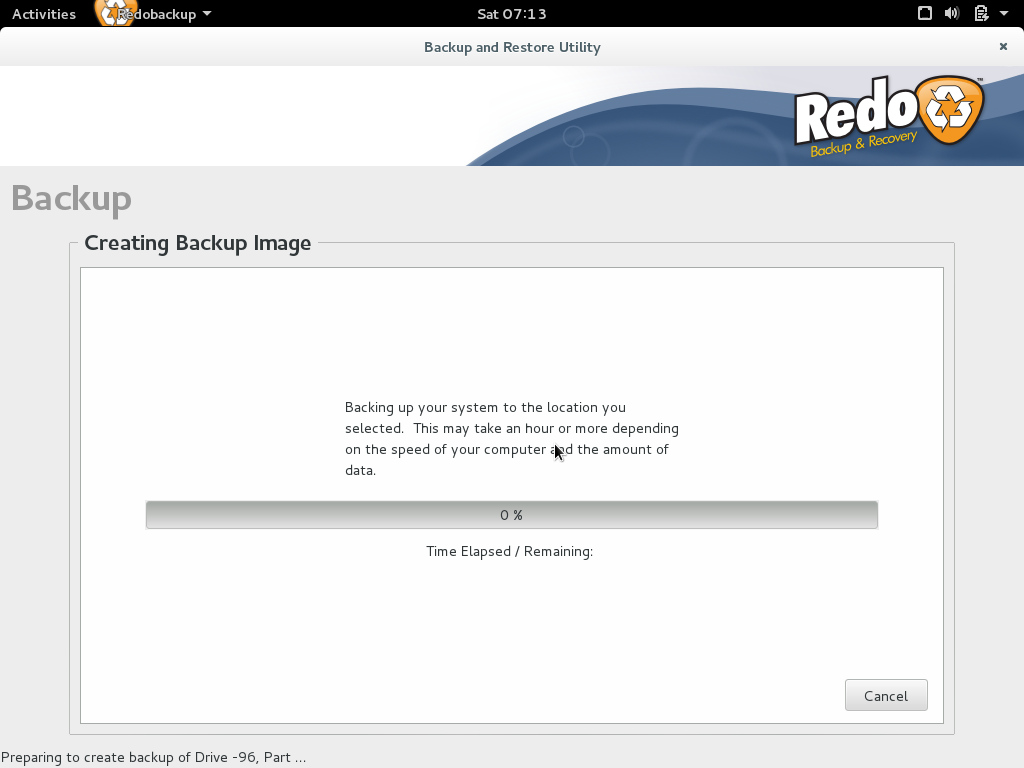
The console gives us an error:
sh: 1: partclone.extfs: not foundSolved by:
apt-get install partcloneYou can't save mounted partition, you will have the following error:
|
|
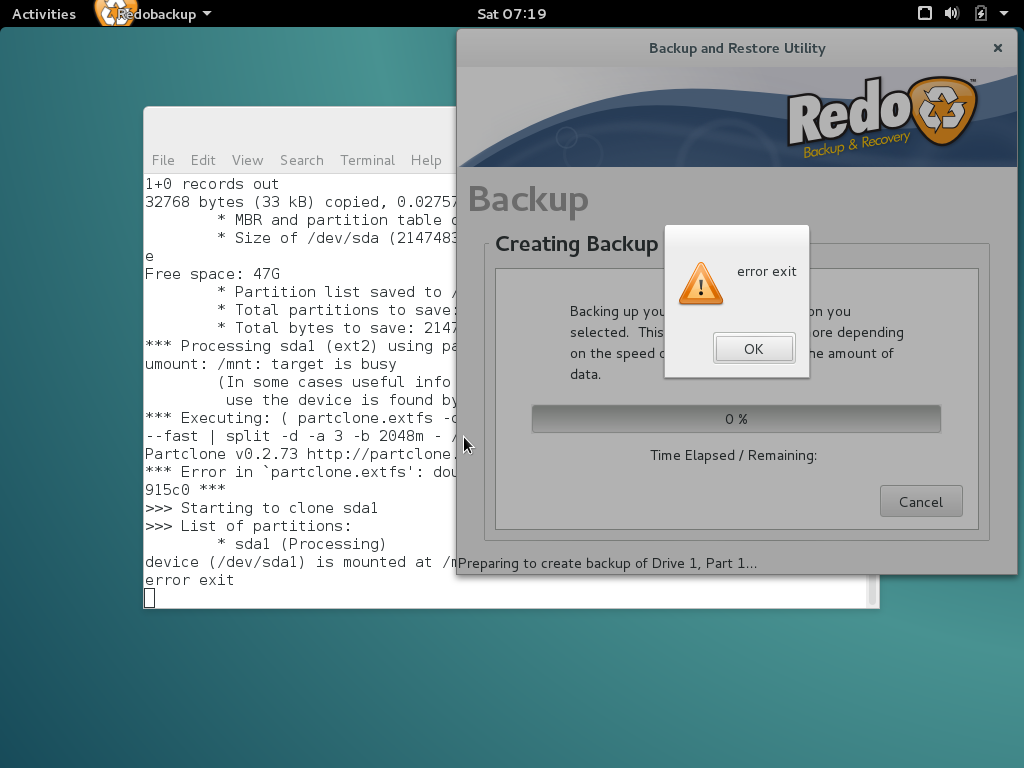
Error in the console :
device (/dev/sda1) is mounted as /mnt
error exit
We made a Backup/restore with success.
In our French translation, the progress bar didn't work. We solved the problem removing the partclone .mo french translation file.
sudo rm /usr/share/locale/fr_FR/LC_MESSAGES/partclone.mo3-2. Package make▲
We prepare our package structure in a folder named redobackup. This one will contain the following tree:
- /sbin/redobackup*;
- /usr/share/redo/*.
Do not forget to copy the « drivereset » script, provided with RedoBackup.
Next, we create the DEBIAN/control file:
Package: RedoBackup
Version: 1.0
Architecture: all
Depends: libxml-simple-perl, libcanberra-gtk-module, libnotify-bin, beep, fsarchiver, os-prober, partclone
Maintainer: Christophe LOUVET & Philippe RONFLETTE <xxxx@yyy.zzz>
Description: Packaging of Redobackup script www.redobackup.fr
We create a preinst file displaying a message:
#/bin/bash
echo "Redo Backup installation "
echo "www.redobackup.org"
echo "Packaging : Christophe LOUVET & Philippe RONFLETTE"
We change the scripts rights:
sudo chmod 755 redobackup/DEBIAN/pre*
sudo chmod 755 redobackup/DEBIAN/post*
Then we generate package:
sudo dpkg-deb --build redobackup3-3. Test of the created package▲
3-3-1. Package installation▲
Once the package is created, we try to install it with the following command:
sudo dpkg -i redobackup.debThis will return a dependency error. It's normal, you must run the following command to solve it:
sudo apt-get install -fTo overcome this, a community package submission is required. However, it's acceptation is unlikely, the project is no more evolving. It would be possible to create your own repository.
3-3-2. Test on actual Debian 8 live CD▲
After the installation, the RedoBackup script is in /sbin folder. We make a backup/restore test. The result is ok.
3-3-3. Test on Xenial Ubuntu live CD▲
Ubuntu Xenial will be the destination version of our project. The system doesn't succeed to install the following packages:
- beep;
- fsarchiver;
- partclone.
To solve this problem, we needed to add the universe repository in the /etc/apt/sources.list file and do a apt-get update for installing the packages above.
Once installed, RedoBackup doesn't start. An error appears in the console:
can't locate Glib.pm in @INC...Solved by:
apt-get install libglib-perlNext, another error:
can't locate Gtk2.pm in @INC...Solved by:
apt-get install libgtk2-perlOnce these packages are installed, the backup/restore tests run successfully.
So we'll need to add this packages in the list of required dependencies.
3-3-3-1. Ghost partition in selection▲
In Ubuntu, we have a ghost partition named “UNKNOW”:
|
|
We had the same problem in our French translation, we corrected it modifying the RedoBackup script, Here is the procedure:
RedoBackup uses externals programs such as Partclone, fsarchiver.
Let's see the result displayed by the fsarchiver command:
fsarchiver probe
ubuntu@PC-test:~# sudo fsarchiver probe

[======DISK======] [=============NAME==============] [====SIZE====] [MAJ] [MIN]
[sda       ] [VBOX HARDDISK         ] [  20.00 GB] [ 8] [ 0]
[sdb       ] [VBOX HARDDISK         ] [   8.00 GB] [ 8] [ 16]
[sr0       ] [CD-ROM             ] [  739.24 MO] [ 11] [ 0]
[sr1       ] [CD-ROM             ] [  326.21 MO] [ 11] [ 1]

[=====DEVICE=====] [==FILESYS==] [======LABEL======] [====SIZE====] [MAJ] [MIN]
[ram0      ] [<unknown> ] [<unknown>    ] [  64.00 MB] [ 1] [ 0]
[ram1      ] [<unknown> ] [<unknown>    ] [  64.00 MB] [ 1] [ 1]
[ram2      ] [<unknown> ] [<unknown>    ] [  64.00 MB] [ 1] [ 2]
[ram3      ] [<unknown> ] [<unknown>    ] [  64.00 MB] [ 1] [ 3]
[ram4      ] [<unknown> ] [<unknown>    ] [  64.00 MB] [ 1] [ 4]
[ram5      ] [<unknown> ] [<unknown>    ] [  64.00 MB] [ 1] [ 5]
[ram6      ] [<unknown> ] [<unknown>    ] [  64.00 MB] [ 1] [ 6]
[ram7      ] [<unknown> ] [<unknown>    ] [  64.00 MB] [ 1] [ 7]
[ram8      ] [<unknown> ] [<unknown>    ] [  64.00 MB] [ 1] [ 8]
[ram9      ] [<unknown> ] [<unknown>    ] [  64.00 MB] [ 1] [ 9]
[ram10      ] [<unknown> ] [<unknown>    ] [  64.00 MB] [ 1] [ 10]
[ram11      ] [<unknown> ] [<unknown>    ] [  64.00 MB] [ 1] [ 11]
[ram12      ] [<unknown> ] [<unknown>    ] [  64.00 MB] [ 1] [ 12]
[ram13      ] [<unknown> ] [<unknown>    ] [  64.00 MB] [ 1] [ 13]
[ram14      ] [<unknown> ] [<unknown>    ] [  64.00 MB] [ 1] [ 14]
[ram15      ] [<unknown> ] [<unknown>    ] [  64.00 MB] [ 1] [ 15]
[loop0      ] [squashfs  ] [<unknown>    ] [  694.65 GB] [ 7] [ 0]
[sda1      ] [ext3    ] [<unknown>    ] [  20.00 GB] [ 8] [ 1]
[sdb1      ] [vfat    ] [<unknown>    ] [   8.00 GB] [ 8] [ 17]
The result varies depending on your configuration,
We notice that the ghost disks are corresponding to RAMDISK.
In the code , we search lines calling fsarchiver. We find it in these functions:
- sub find_local_drives;
- sub find_local_partitions.
In the find_local_partitions function, we found the following code:
# Get each partition's details
   next if $line =~ m/^\n/;
   next if $line =~ m/^loop/;
   next if $line =~ m/^ramzswap/;
   next if $line =~ m/^dm-/;
Try to add the following line:
The restart RedoBackup and click “Backup”:
|
|
We replace the script in the .deb file and increase version number in redo/version file.
3-3-4. Tests on Linux Mint live CD▲
We will make tests on three different versions, with different Window managers:
- Linux Mint Cinnamon;
- Linux Mint MATE;
- Linux Mate xfce.
All results are correct.
4. RedoBackup distribution built from minimal Ubuntu▲
We want to get to an ISO Redobackup image based on a 64 bits Ubuntu 16,04. It's applicable to a 32 bits. In part 5, we will see how to build a UEFI Secureboot supported version.
The principle: we install a minimal Ubuntu (kernel and console) that we personalize. Next we will use this install to build a compressed file system allowing us to make an ISO image for live or USB.
These operations can be made indifferently in real, or in a virtual machine.
4-1. Distribution Installation & preparation▲
4-1-1. Minimal distribution Installation▲
We used a net install to install our minimal Ubuntu.
|
|
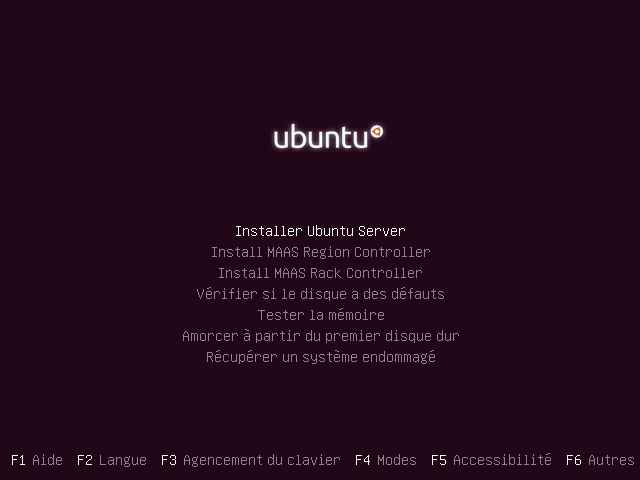
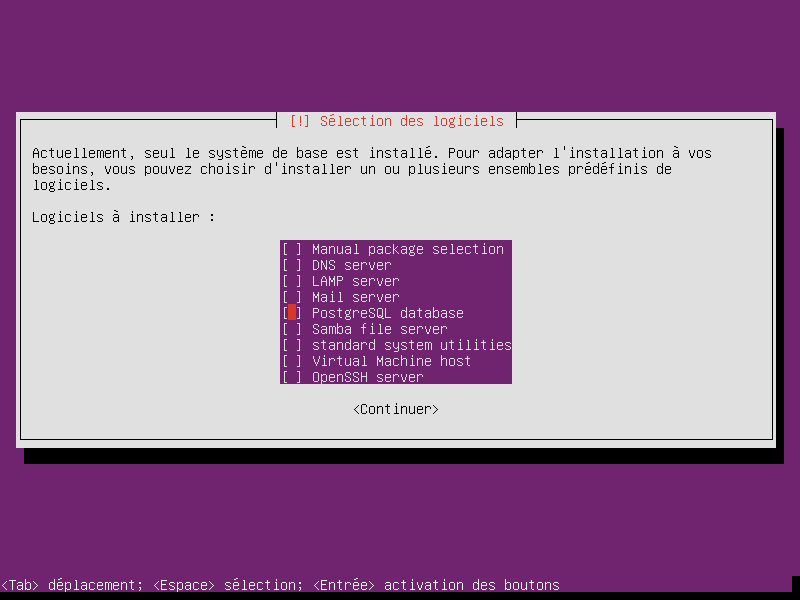
During installation, we will uncheck everything to have a minimal installation.
|
|
After installation, after first boot, we have this screen:.
|
|
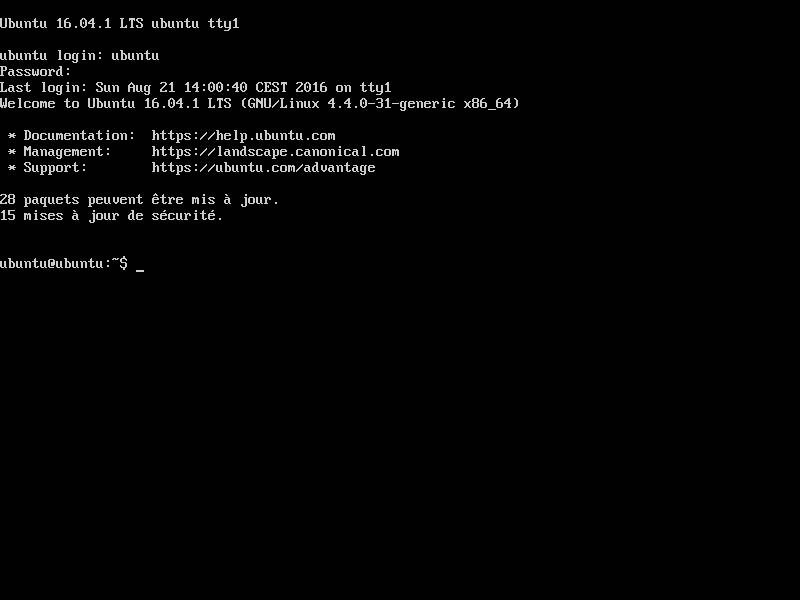
We start changing root password, the root account is disabled by default under Ubuntu.
sudo passwd rootOnce password updated, we log in root.
You should never work as root. We deviate from this rule, our distribution being transformed in live cd.
Notice than graphical interfaces such as KDE or Gnome forbid using the root account.
We update the package list:
apt-get updateAnd upgrade distribution:
apt-get upgrade4-1-2. Graphical interface adding▲
Next, we install the minimal graphical interface OpenBox:
apt-get install openboxWe try to launch the graphical interface:
startxIt doesn't work, we have no X server:
apt-get install xorgThen , startx call works and we have a grey screen:
|
|

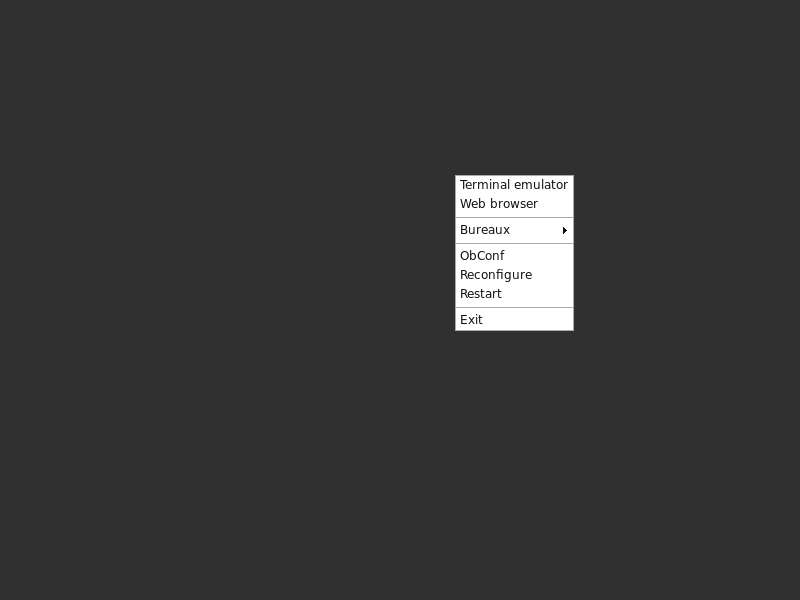
The interface is operational, if we cllick the right mouse button, we have access to the OpenBox menu:
|
|
4-1-3. Applications installation▲
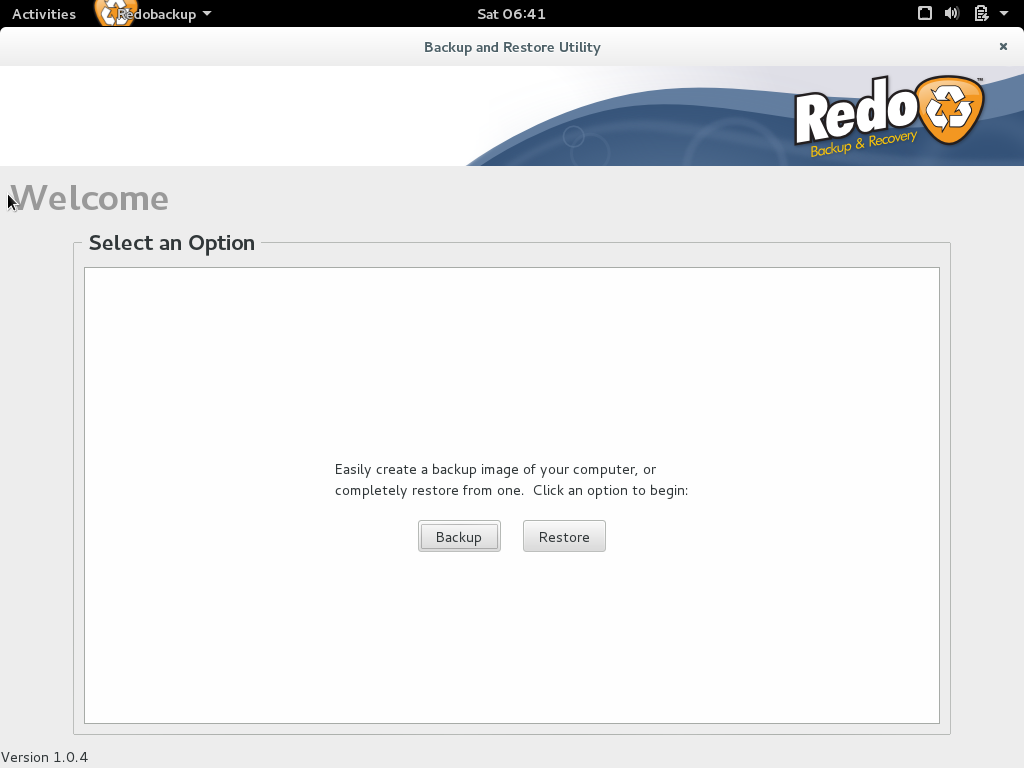
We install the essential: RedoBackup. Once the .deb is retrieved (with a USB flashkey for example), installation runs without difficulties, and we have a good surprise, backup & restore icons are OK.
Here's the rest of the installation commands:
dpkg -i redobackup.deb
apt-get install -f
We install the main tools present in the original CD:
apt-get install leafpad pcmanfm gparted gpicview testdisk system-config-lvmWe modify the /etc/xdg/openbox/menu.xml to put the main applications in the contextual menu.
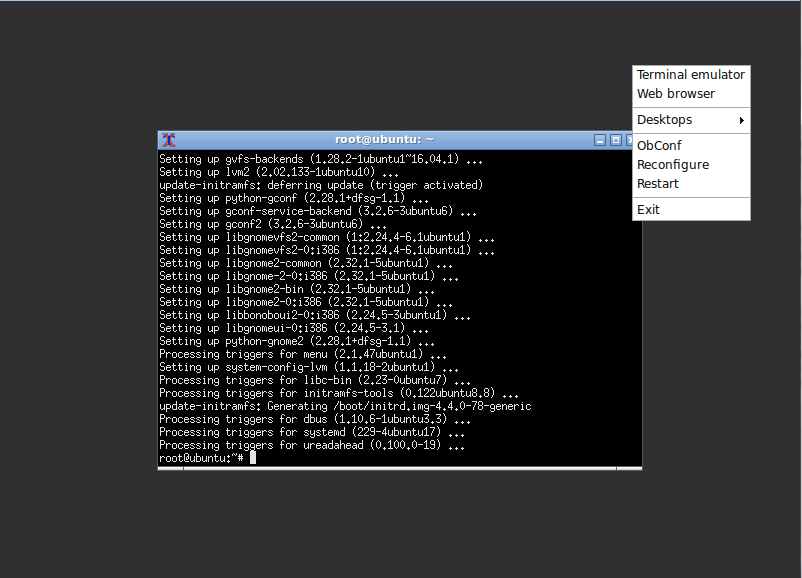
Before:
|
|
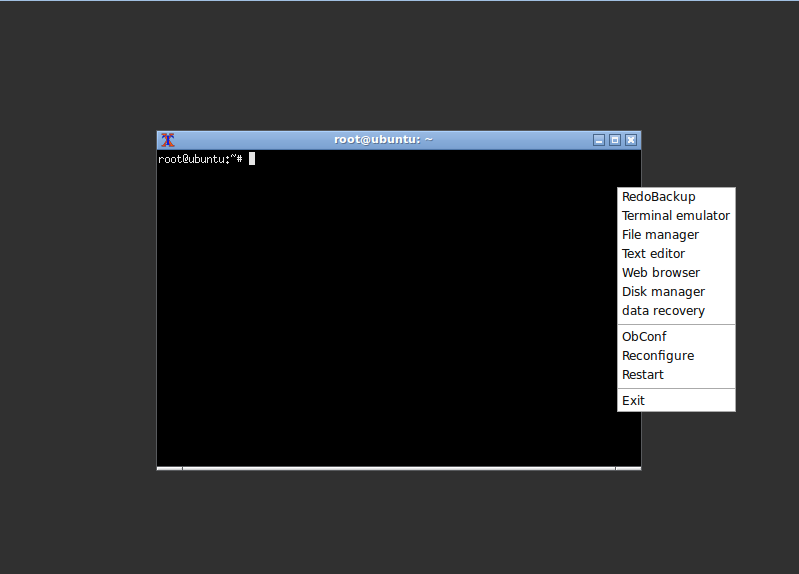
After:
|
|
We replaced Baobab with gdmap, lighter:
apt-get install gdmapWe don't install Chromium but Midori, which is lighter, instead.
apt-get install midoriWe replaced the web browser entry in the contextual menu.
4-1-4. Distribution setting▲
We will make various adjustments, necessary or useful for our live CD/USB.
4-1-4-1. Dock adding▲
We tried to install Adeskbar, without success.
We have tested:
- lxpanel;
- wbar;
- cairo-dock.
We choose cairo-dock, which is very light, easily adjustable, and visually nice.
4-1-4-1-1. Cairo-dock installing▲
To install Cairo-dock, we just do:
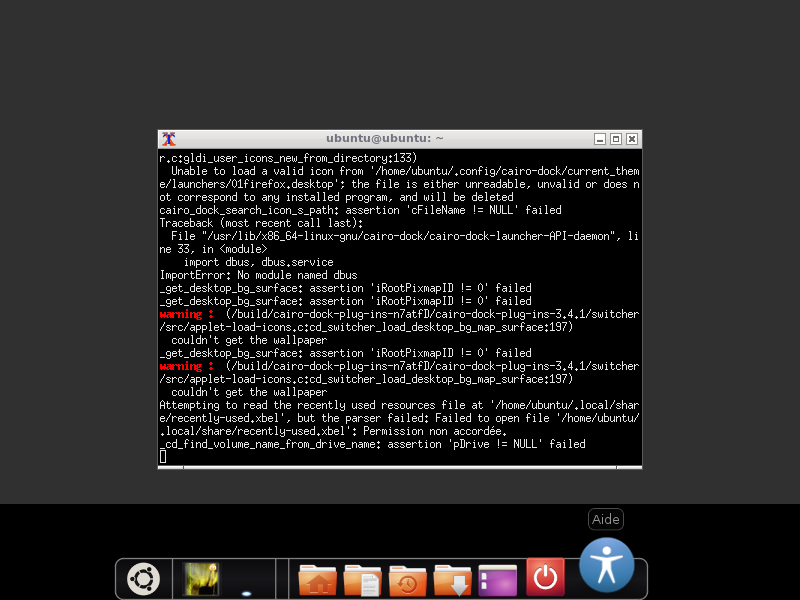
apt-get install cairo-dockAnd launch it with:
cairo-dockA dialog box asks us if we want to use OpenGL, and tells us we can add the -o option to start in OpenGL mode:
|
|
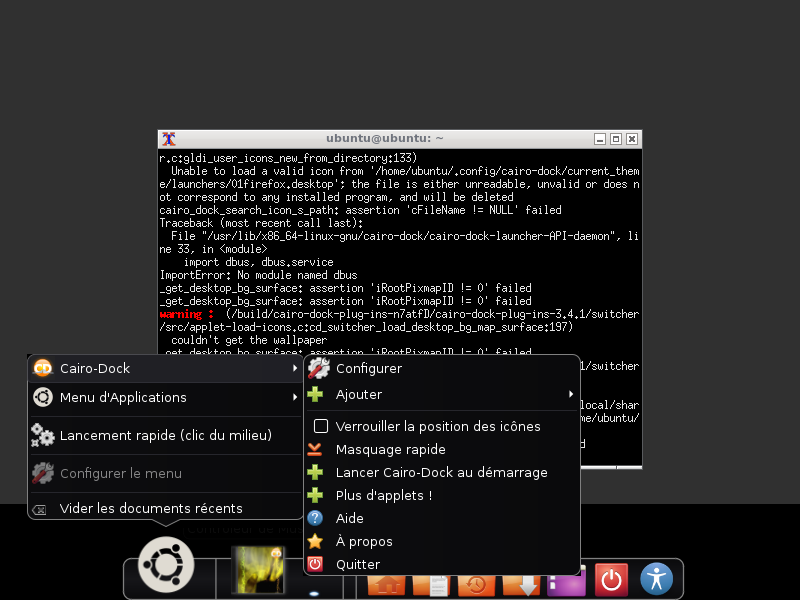
Next, we click on the mouse right button in the dock to try to access to it's configuration:
|
|
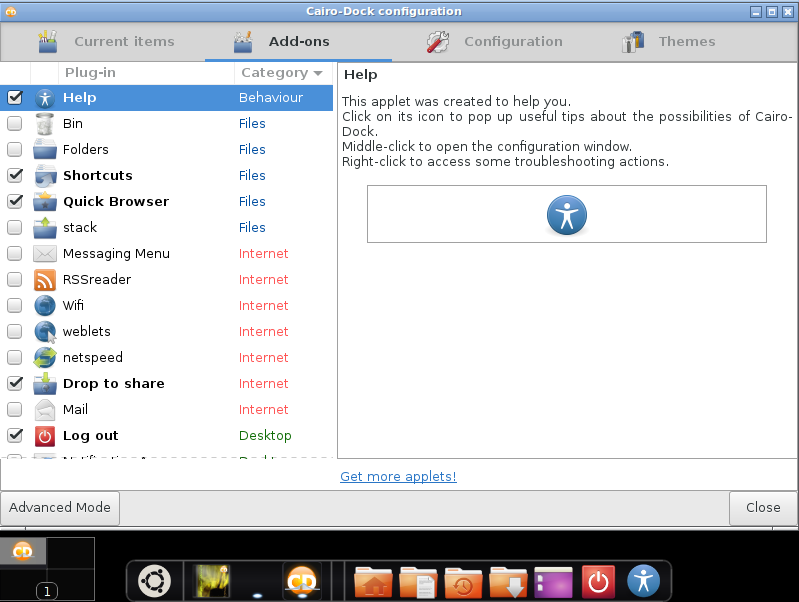
We go to the plugins allowing to deactivate the unwanted icons:
|
|
On the bottom left, there is a “advanced mode” button. This one give us more options:
|
|
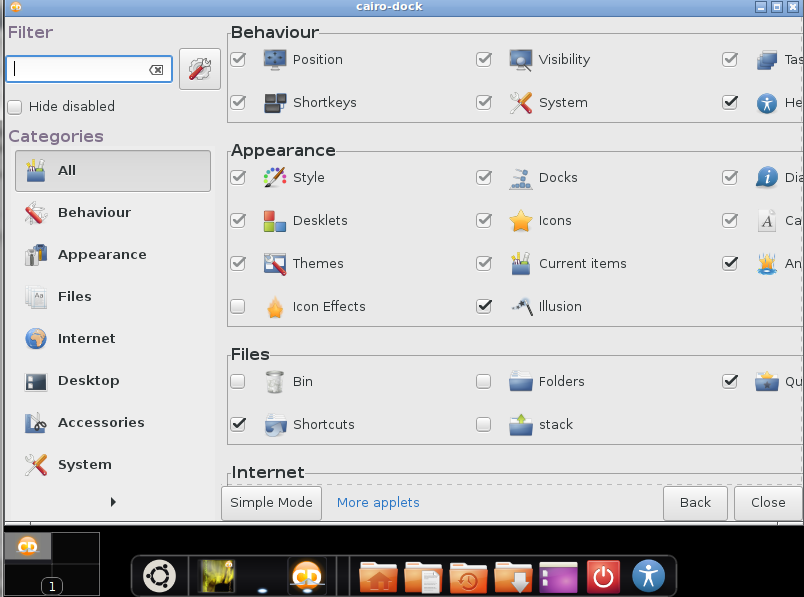
We selected the “clock” option.
To put the icons at the desired location, you can just move them with the mouse.
To add icons of different applications, you just have to launch them, right click on it in the cairo-dock, click the menu with application name, then click “make it a launcher”:
|
|
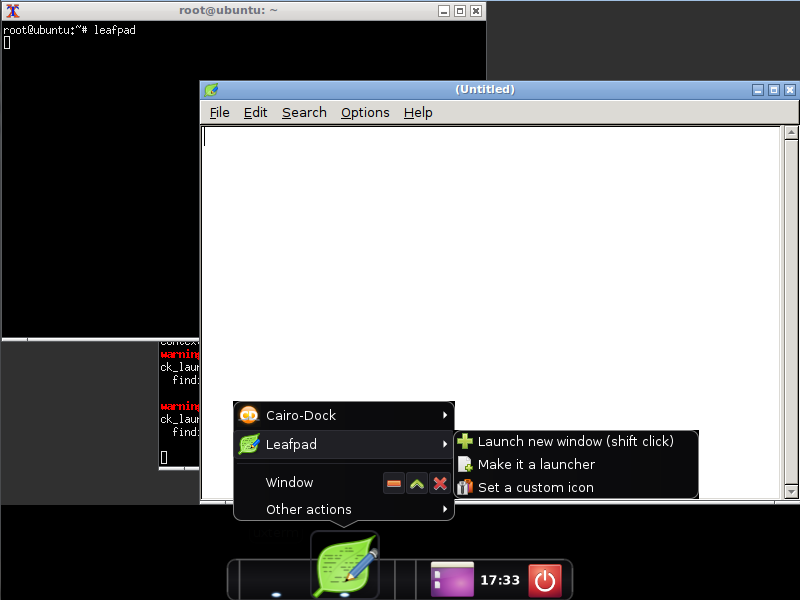
The placement of the RedoBackup icon give us a problem. The normal procedure gave us the following error message:
Sorry, could'nt find the corresponding description file. Consider dragging and dropping the launcher from the application menuTo overcome this, we created a .desktop file for RedoBackup. We made of copy of one in /usr/share/applications and modified it. Once this manipulation was made, adding the icon was possible.
We add this .desktop file in our redobackup.deb package.
4-1-4-2. Application launch & file configuration▲
We start to automate the OpenBox starting. We will for this use slim (Simple Login Manager):
apt-get install slimWe edit the configuration /etc/slim.conf file.
We uncomment the line :
#default_user simoneAnd put the root name
We also uncomment the line:
#auto_login noAnd replace “no” by “yes”.
Slim modifies the default path, making RedoBackup inoperative. To overcome this, we retrieved the default path before installing slim with:
echo $PATH>chemin.txtThe slim.conf contains a line:
default_pathWe sent the chemin.txt content in slim.conf file via:
cat chemin.txt >>/etc/slim.confAnd we drag and drop with addition opn the “path” line.
To automatically start RedoBackup when the session starts up, we add the following line to the /etc/xdg/openbox/autostart file:
/sbin/redobackup &The “&” at the end of line, as with the command interpreter, to launch the program to continue in the background.
We also add a entry to cairo-dock :
cairo-dock &The previous command blocks after cairo-dock loading.
To overcome this problem, we have modified command as bellow to delay the execution.
sleep 15 && cairo-dock &4-1-4-3. Various settings for applications & distribution▲
We integrate the background picture from the original version. We install feh package:
apt-get install fehWe retrieve the original picture in the orginal iso (the /usr/share/backgrounds/redo_blue.png file), as seen hereApplications installation. We place it in the /usr/share/redo folder.
To activate in on boot, we add the following line to the /etc/xdg/openbox/autostart file:
feh -bg-scale /usr/share/redo/redo_blue.png &We can make personal configuration changes like:
- The web browser Midori configuration and it's search engines;
- The PCManFM default behavior for example: display network in places: edit menu->Preferences->layout - check the box network.
4-1-4-4. Distribution cleaning▲
Now, we will clean the distribution to to lighten the target iso.
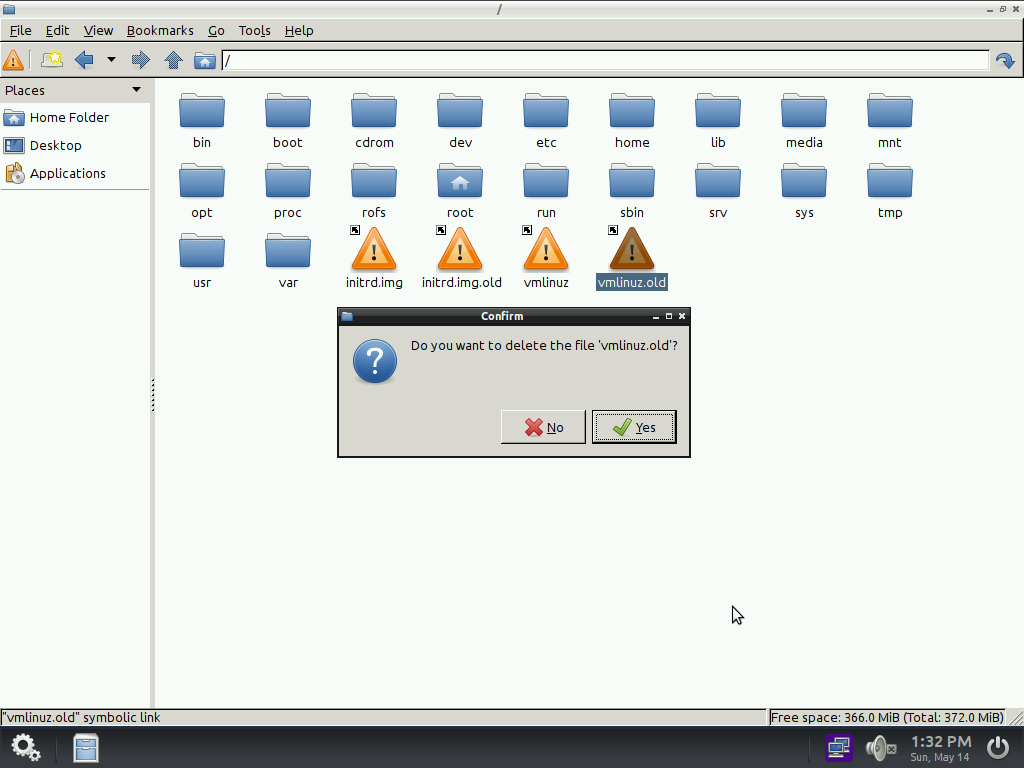
From OpenBox, to definitively delete a file without it going through the bin, just click simultaneously [shift] and [Del].
We will uninstall unused packages, we can have installed package list with:
dpkg -l|moreUninstall important package can make your system unusable; in doubt, skip this step.
Here are some example of packages we uninstalled:
- aspell;
- colord;
- enchant;
- lxd-client;
- sosreport;
- ubuntu-cloudimage-keyring.
To uninstall a package:
apt-get purge [package name]We use deborphan to remove all unused packages:
apt-get install deborphan
apt-get purge $(deborphan)
apt-get purge deborphan
apt autoremove
Then we install and use bleachbit, as seen hereCleaning.
We ensure a complete cleaning with a few more operations.
We delete logs files in /var/log:
rm -rf /var/log/*.logThe crash files:
rm -r /var/crash/*The thumbnails in ~/.thumbnails
rm -rf ~/.thumbnails/normal/*the tmp directory:
rm -rf /tmp/*We also reduce used space by deleting icon themes in /usr/share/icons. We only keep Hicolor, Humanity, Humaniry-dark, ubuntu-mono-light et ubuntu-mono-dark.
We also can delete wallpapers in /usr/share/wallpapers:
rm -rf /usr/share/wallpapers/*The deletion of icons used by cairo-dock can generate problem with this.
Let's empty the current user trash:
rm -rf ~/.local/share/Trash/*We also can delete manually man files, locale files for other languages and linuxc headers in /usr/src, documentations in /usr/share/doc.
If needed, the package re-installation will reinstall deleted files.
4-2. File system preparation▲
4-2-1. Build of necessary folders & file system creation▲
We start to define environment variables which you can customize. The user doesn't need to be modified.
export CONSTRUCTION=/mnt/construction
export CD=/mnt/cd
We prepare working folders:
mkdir -p "$CD"/casperWe copy the files of our installed distribution, excluding some files and folders via rsync command:
 rsync -av --one-file-system --exclude=/dev/* \
--exclude=/tmp/* --exclude=/home/* --exclude=/var/tmp/* --exclude=/boot/grub/* --exclude=/root/* \
--exclude=/var/spool/* --exclude=/media/* \
--exclude=/etc/fstab --exclude=/etc/mtab \
--exclude="$CONSTRUCTION" --exclude="$D" / /"$CONSTRUCTION"
4-2-2. Required operations in the new system▲
chroot is a technique allowing to place yourself in another filesystem and use the calling operating system resources. We can work in this other file system as in the calling one.
We start to mount some special folders in our new file system from the chroot content folder. The mount points /proc, /sys et dev/pts, must be remount in the chroot folder. (The -bind option allows to not modify /etc/fstab file):
cd $CONSTRUCTION
mount --bind /proc proc
mount --bind /sys sys
mount -t devpts none dev/pts|
|
The rsync command had not processed the dev folder, this one is empty in our chroot folder. So we have to create it before preparing mount points: Sélectionnez |
We go in our chroot folder:
chroot "$CONSTRUCTION"We install essential package for live image built, after updated package list.
We didn't have network in chroot. We needed to exit and copy the /etc/resolv.conf file after removing /etc/resolv.conf symbolic link towards /run/resolvconf.d.
apt-get update
apt-get install casper lupin-casper
We ensure a complete system cleaning:
apt-get cleanCleaning log files with:
find /var/log -regex '.*?[0-9].*?' -exec rm -v {} \;Reset of existing logs:
find /var/log -type f | while read file
do
    cat /dev/null | tee $file
done
Then we leave chroot:
exitAnd we unmount folders mounted in chroot:
umount dev/pts sys proc4-3. ISO image build▲
4-3-1. Implementation of kernel▲
We copy the kernel and 'initramfs (also called initrd) in the iso casper folder:
mv "$CONSTRUCTION"/boot/vmlinuz-$(uname -r) "$CD"/casper/vmlinuz
mv "$CONSTRUCTION"/boot/initrd.img-$(uname -r) "$CD"/casper/initrd.img
4-3-2. System compression▲
We install the needed tools:
apt-get install xorriso squashfs-toolsThen we build the compressed image:
mksquashfs "$CONSTRUCTION" "$CD"/casper/filesystem.squashfs4-3-3. Bootloader installation▲
We simply can retrieve bootloader files on the original ISO. We copy the install and isolinux folders. We put them in our $CD folder. We make sure the /isolinux/isolinux.cfg entries have correct names going to our /casper folder: vmlinuz et initrd.img. In relation to the original entries, we had to change extension of initrd file, original compression being lz.
4-3-4. Iso building▲
We install the image ISO construction tool:
apt-get install genisoimageThen we launch this construction with:
genisoimage -o "live-redo.iso" -r -J --no-emul-boot --boot-load-size 4 --boot-info-table -b isolinux/isolinux.bin -c isolinux/boot.cat "$CD"In this command, you can replace « live-redo.iso » with any other ISO image you want.
5. SecureBoot compatibility▲
SecureBoot is part of the UEFI specifications.
We will start to describe what is UEFI.
5-1. What is UEFI?▲
UEFI (Unified Extensible Firmware Interface) is what replaces BIOS in recent machines. UEFI is a full microsystem, responsible for operating systems starting. It includes a UEFI Shell. It's possible to develop UEFI applications. Motherboards include a BIOS emulation for backward compatibility. Your hard drive will contain an ESP partition, which is in fact a FAT32 filesystem.
A .efi file is a Windows PE format file.
Windows can boot in UEFI mode since Windows Vista SP2, The SecureBoot default activation (and so the presense of UEFI ) is mandatory for a device obtaining the “Windows Compatible” logo since Windows 8.
Concretely, moderns devices contains Microsoft keys allowing to control operating system signatures. If Secureboot is activated, a non signed system by embedded key will not boot.
It's possible to add your own keys, but it's complex. The ubuntu chosen solution was to have it's bootloader signed by Microsoft. Debian, for example, refused that.
Either your BIOS displays a menu to boot in UEFI/egacy mode, or you need to find the options in motherboard menus. The Legacy mode will prevent an UEFI installed operating system to boot,
Deactivate SecureBoot option will allow to boot a non Microsoft key signed operating system.
In the rest of this tutorial, we will use the commonly used expression UEFI BIOS.
5-1-1. GPT▲
GPT (GUID Partition Table) replaces MBR (Master Boot Record) in UEFI BIOS. GPT allows creation of up to 2,2 TB and have up to 128 partitions instead of 4 with MBR. There is an MBR at the beginning of GPT table for backward compatibility. Using UEFI implies using a GPT table instead of MBR.
5-1-2. SecureBoot▲
SecureBoot is an UEFI option allowing signature control before to boot a kernel or a EFI program. The numeric signatures are stored in the motherboard firmware.
Microsoft enforces SecureBoot presence to be Windows Compatible stamp.
“Windows Hardware Compatibility Program Requirements” extract:
Windows 8 and later WHCP requires that systems implement UEFI native boot as the firmware boot mode and Secure Boot as the default out-of-box configuration.
This involve all new computer with Windows 8/10 preinstalled will have activated secureboot.
The Microsoft SecureBoot masterkey was unveiled by mistake.
If you want to use Linux on UEFI with secureboot machine, you have the following solutions;
- deactivate SecureBoot;
- use a Linux distribution that has purchased a Microsoft key such as Redhat or Ubuntu ;
- use the Linux Foundation solution;
- use Shim;
- use our own method as see in 2.12.3SecureBoot support chapter.
5-1-3. Implementation▲
Our distribution being based on Ubuntu, it will be easier to make it SecureBoot compatible.
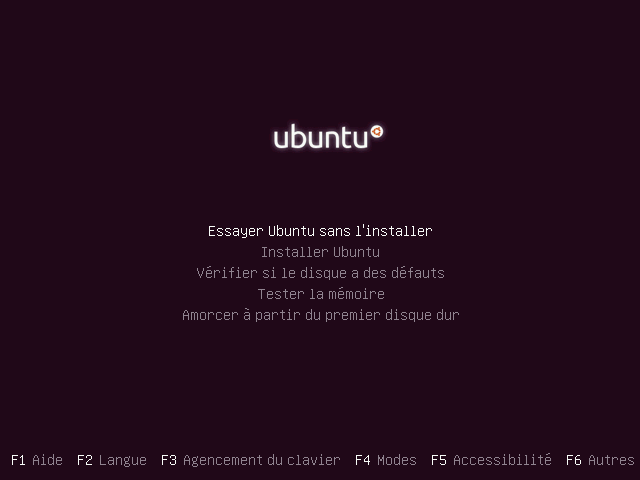
5-2. Ubuntu live cd operation▲
If you start with Ubuntu 16 live CD in BIOS mode, you will have the following screen:
|
|
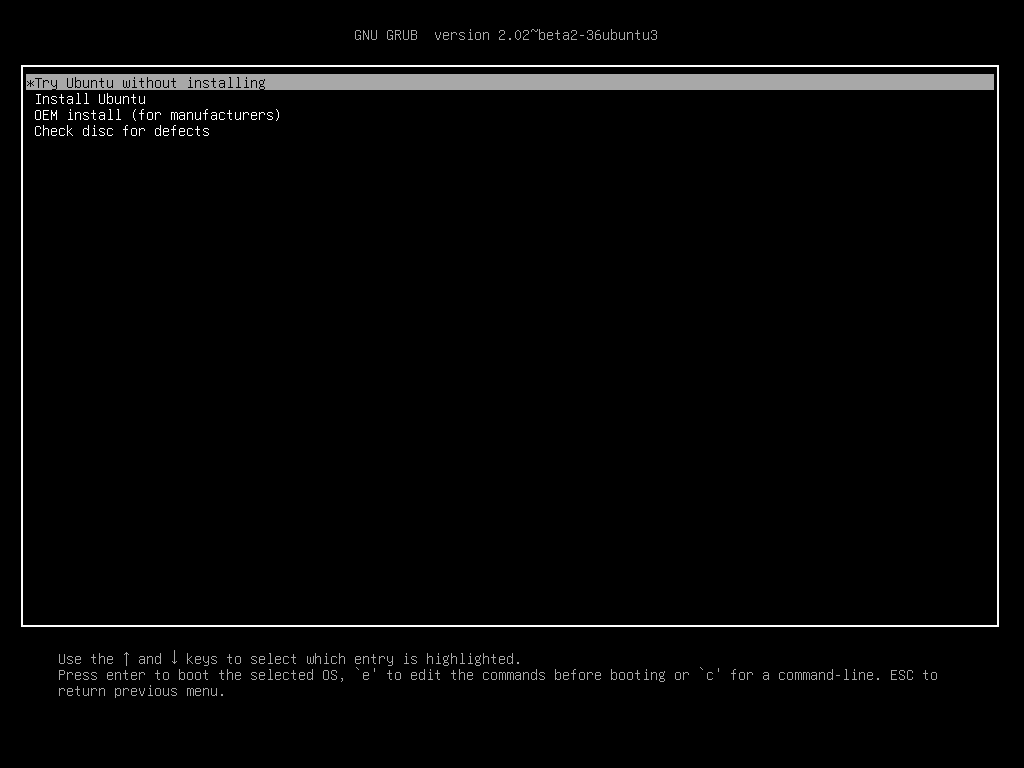
But with the same CD, in UEFI boot, you will have this one:
|
|
If you look at the DVD content, you will see this three different folders:
- isolinux;
- boot/grub;
- EFI/boot.
5-3. Implementation▲
5-3-1. First approach▲
Our CD doesn't boot in UEFI (with or without SecureBoot), and the presence of the isolinux and boot/grub folders leads us to assume boot is running differently according to BIOS or UEFI boot.
By searching information about DVD UEFI compatibility on Internet, we found the following script, allowing burning a UEFI/BIOS hybrid DVD:
xorriso -as mkisofs --isohybrid-mbr isolinux/isohdpfx.bin -c isolinux/boot.cat -b isolinux/isolinux.bin --no-emul-boot --boot-load-size 4 --boot-info-table --eltorito-alt-boot -e boot/grub/efi.img -no-emul-boot -isohybrid-gpt-basdat -o nom_cd.iso .We have understood that the generated CD with this script is a hybrid CD containing a MBR partition and a GPT one. Then, we copy boot and EFI folders from Ubuntu live CD in our preparation folder. We also retrieve casper/vmlinuz.efi.
We modify our isolinux/isolinux.cfg file to replace vmlinuz with vmlinuz.efi.
Our isolinux folder doesn't have a isohdpfx.bin file, the problem is solved installing isolinux and copying it:
sudo apt-get install isolinux
sudo cp /usr/lib/ISOLINUX/isohdpfx.bin /mnt/iso/isolinux
After these changes, and new burning, the CD is booting in BIOS and UEFI mode in a virtual machine, but doesn't seem to work with SecureBoot.
5-3-2. « Hack » of an existing SecureBoot compatible LiveDVD▲
Next, we tried to modify an existing Live.
For this, we used the isomaster tool allowing existing ISO modification:
|
|
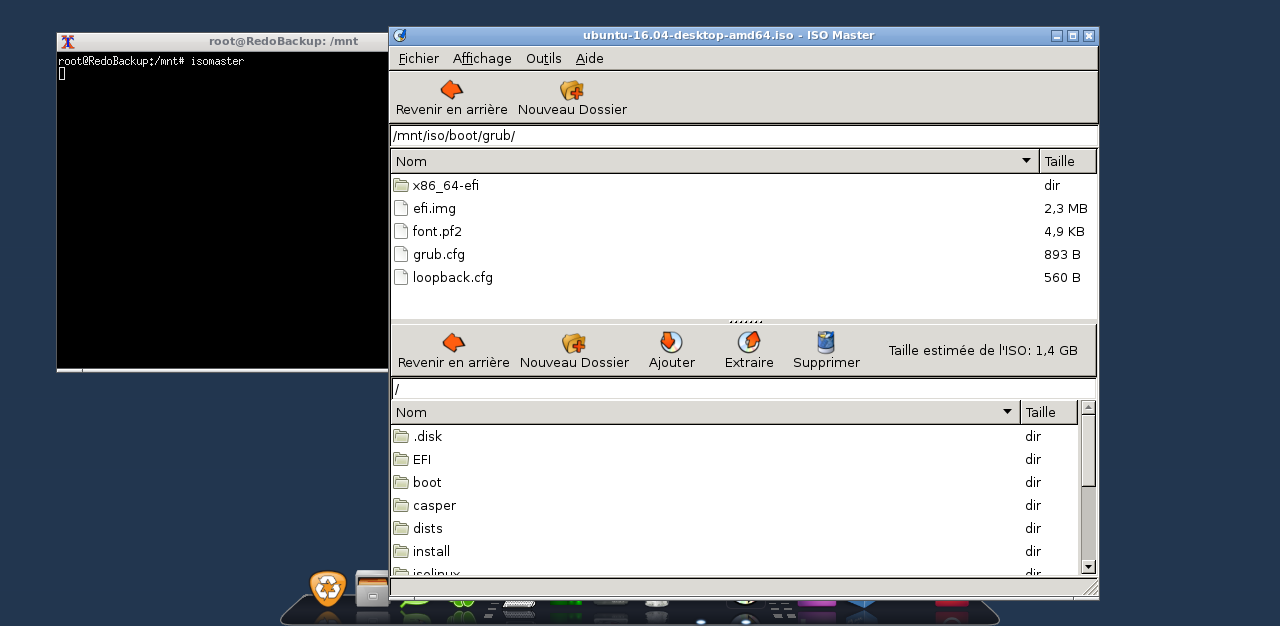
The top part is corresponding to your filesystem content, the bottom is corresponding to the ISO content.
We replace the casper/filesystem.squashfs ISO file with ours. We remove the filesystem.size and filesysstem.squashfs.gpg files.
We replace the isolinux/isolinux.cfg configuration file, and change boot/grub/grub.cfg and loopback.cfg files to match our configuration.
It's not possible to modify a iso file with isomaster, you only can add or remove one.
To be able to modify a file in the ISO, extract it, modify it, and put it back in the ISO.
The isomaster solution only works if your original CD is SecureBoot compatible, else try xorriso script in chapter 5.1.3.
6. Conclusion▲
With this tutorial, you have seen:
- how to generate Debian package;
- how to upgrade a obsolete system and take care of side effects of this manipulation ;
- how to transform a working system in live CD;
- how to make a live CD SecureBoot compatible.
You can download our French live CD version on Sourceforge.
You can download our English version on Sourceforge.
6-1. thanks▲
For the French version, we would like to thank:
Gaby277 for testing.
Zoom61 for remarks and and advice.
ClaudeLeloup and KartSeven for their proofreading.
For English version, we would like to thank:
Lolo78 for proofreading.